Overview
The first page after you sign in. It shows the condition of your number and your messaging performance at a glance.
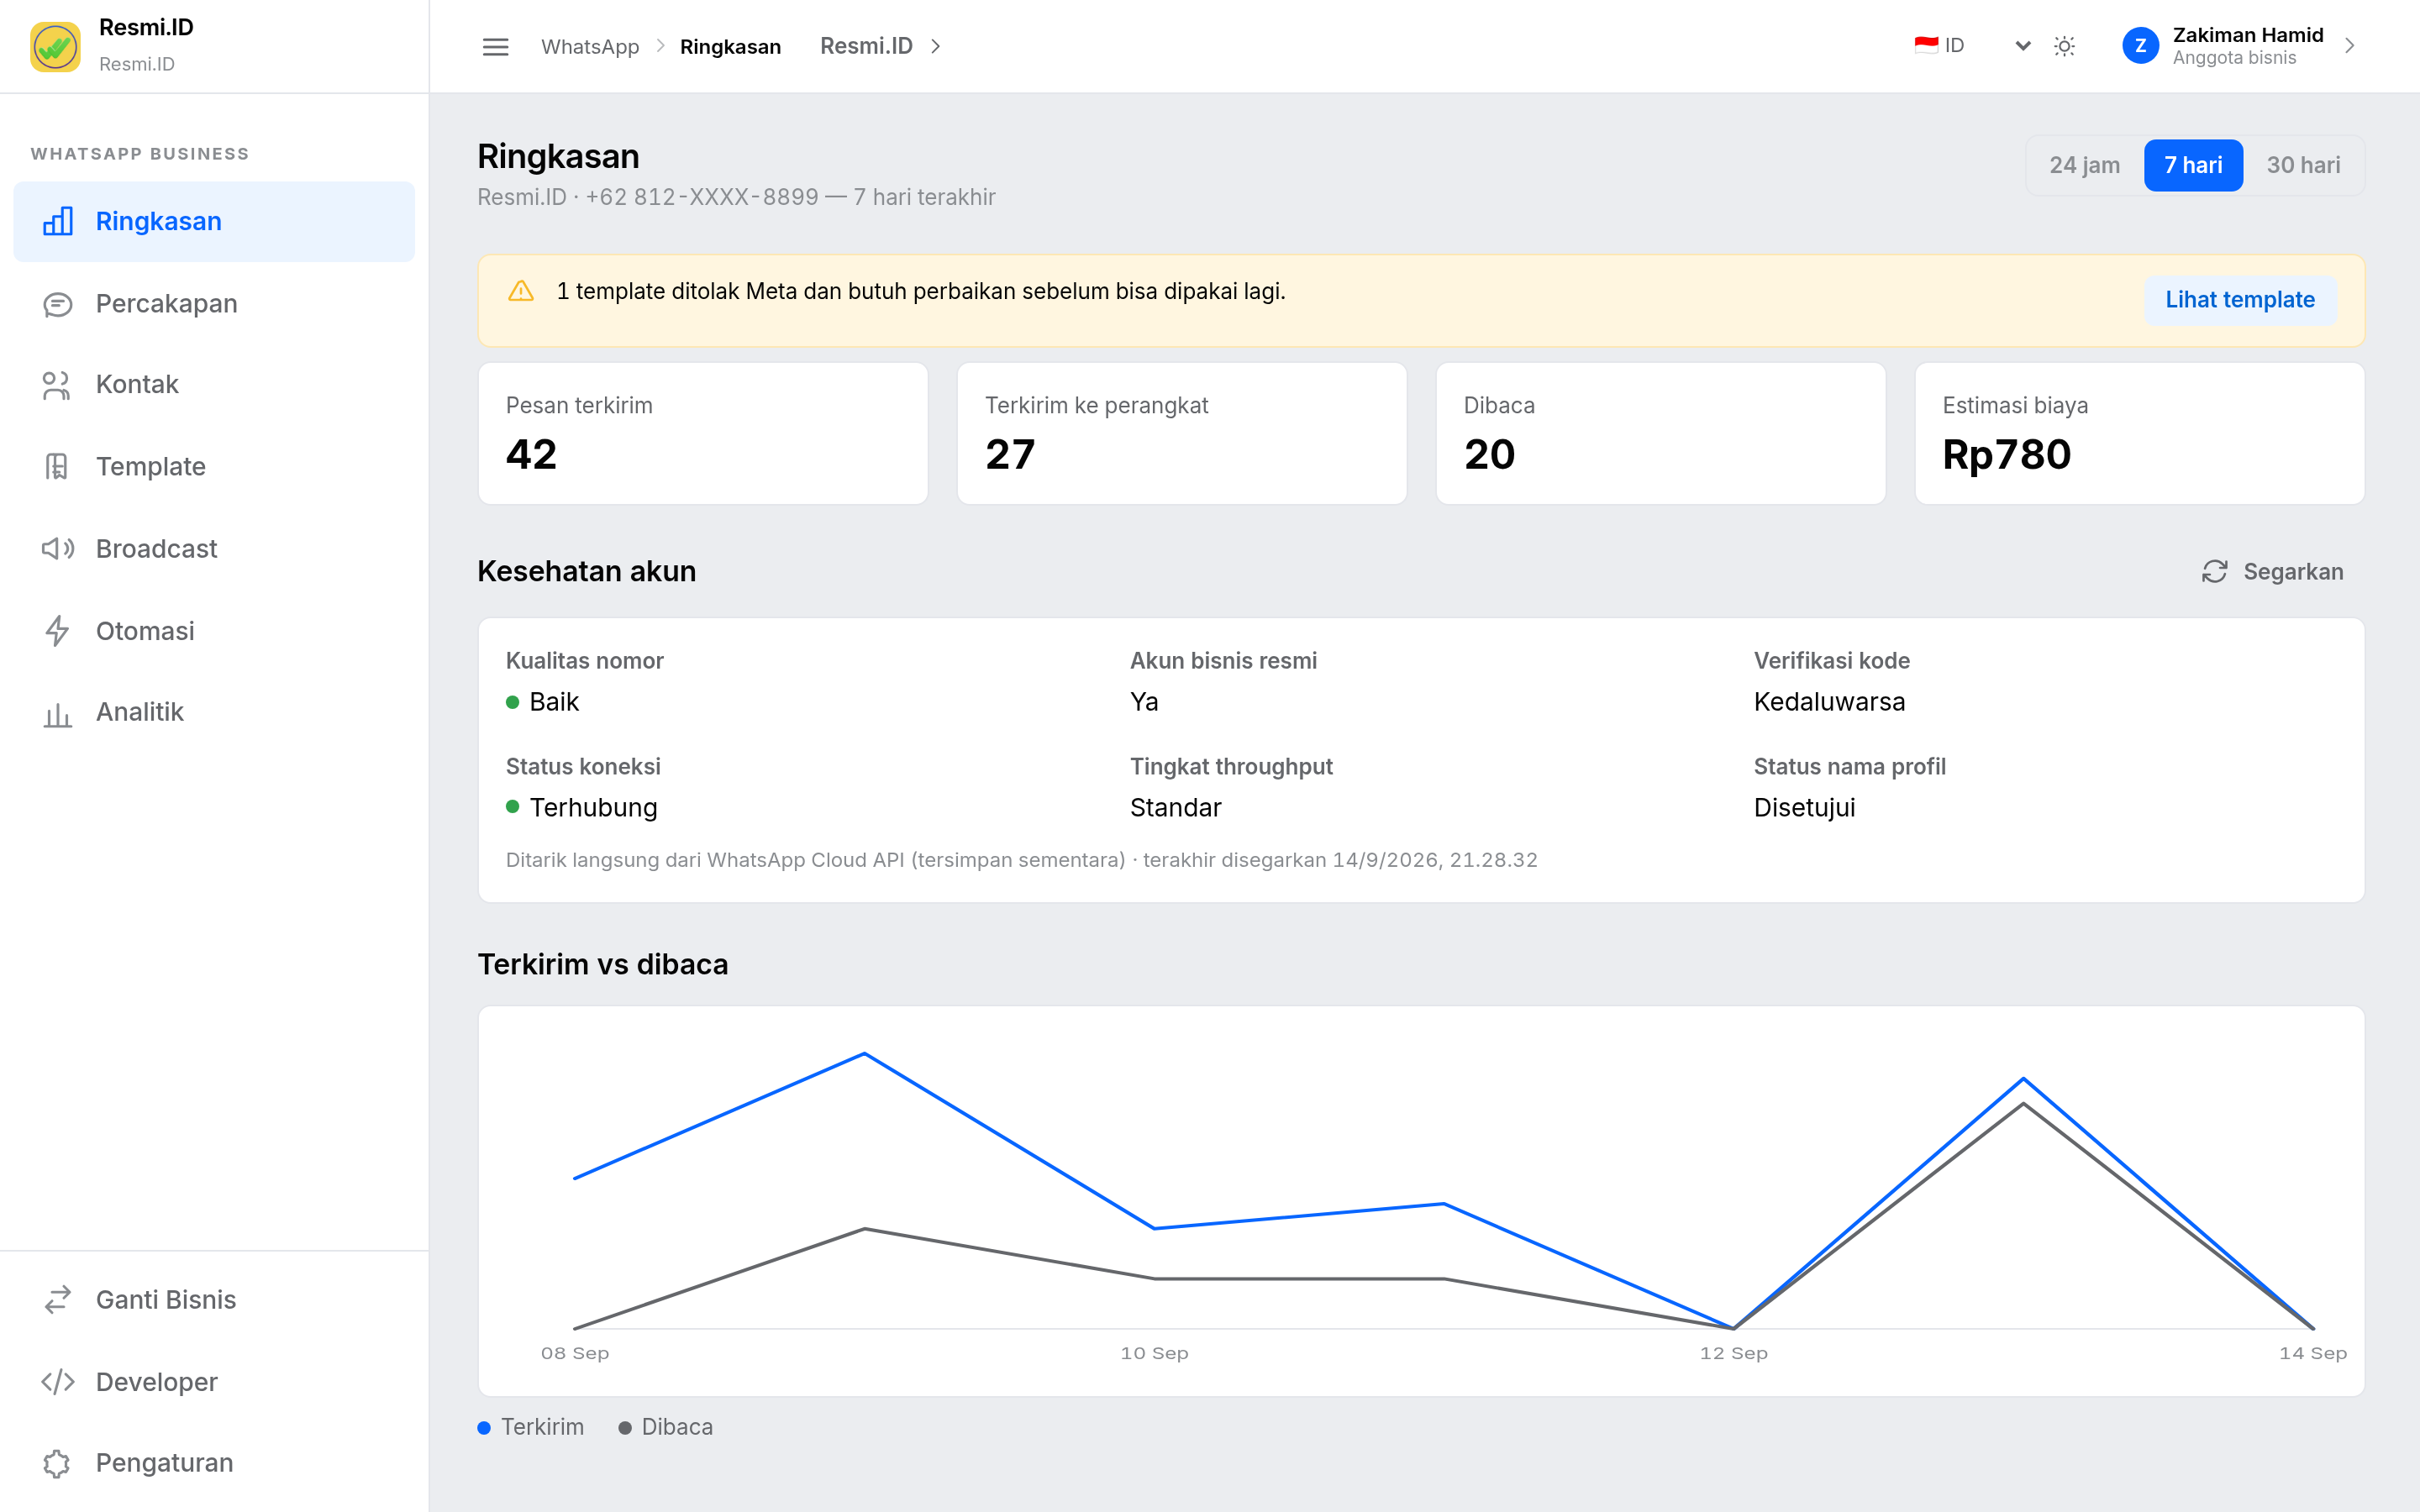
- Pick a time range at the top right: 24 hours, 7 days, or 30 days.
- Read the summary cards: Messages sent, Delivered to device, Read, and Estimated cost.
- Check Account health — this is where you see number quality, official business account status, verification, and connection status.
- Click Refresh to pull the latest data from Meta.
Conversations
The chat space for replying to customers. Every message that arrives at your business WhatsApp number shows up here.
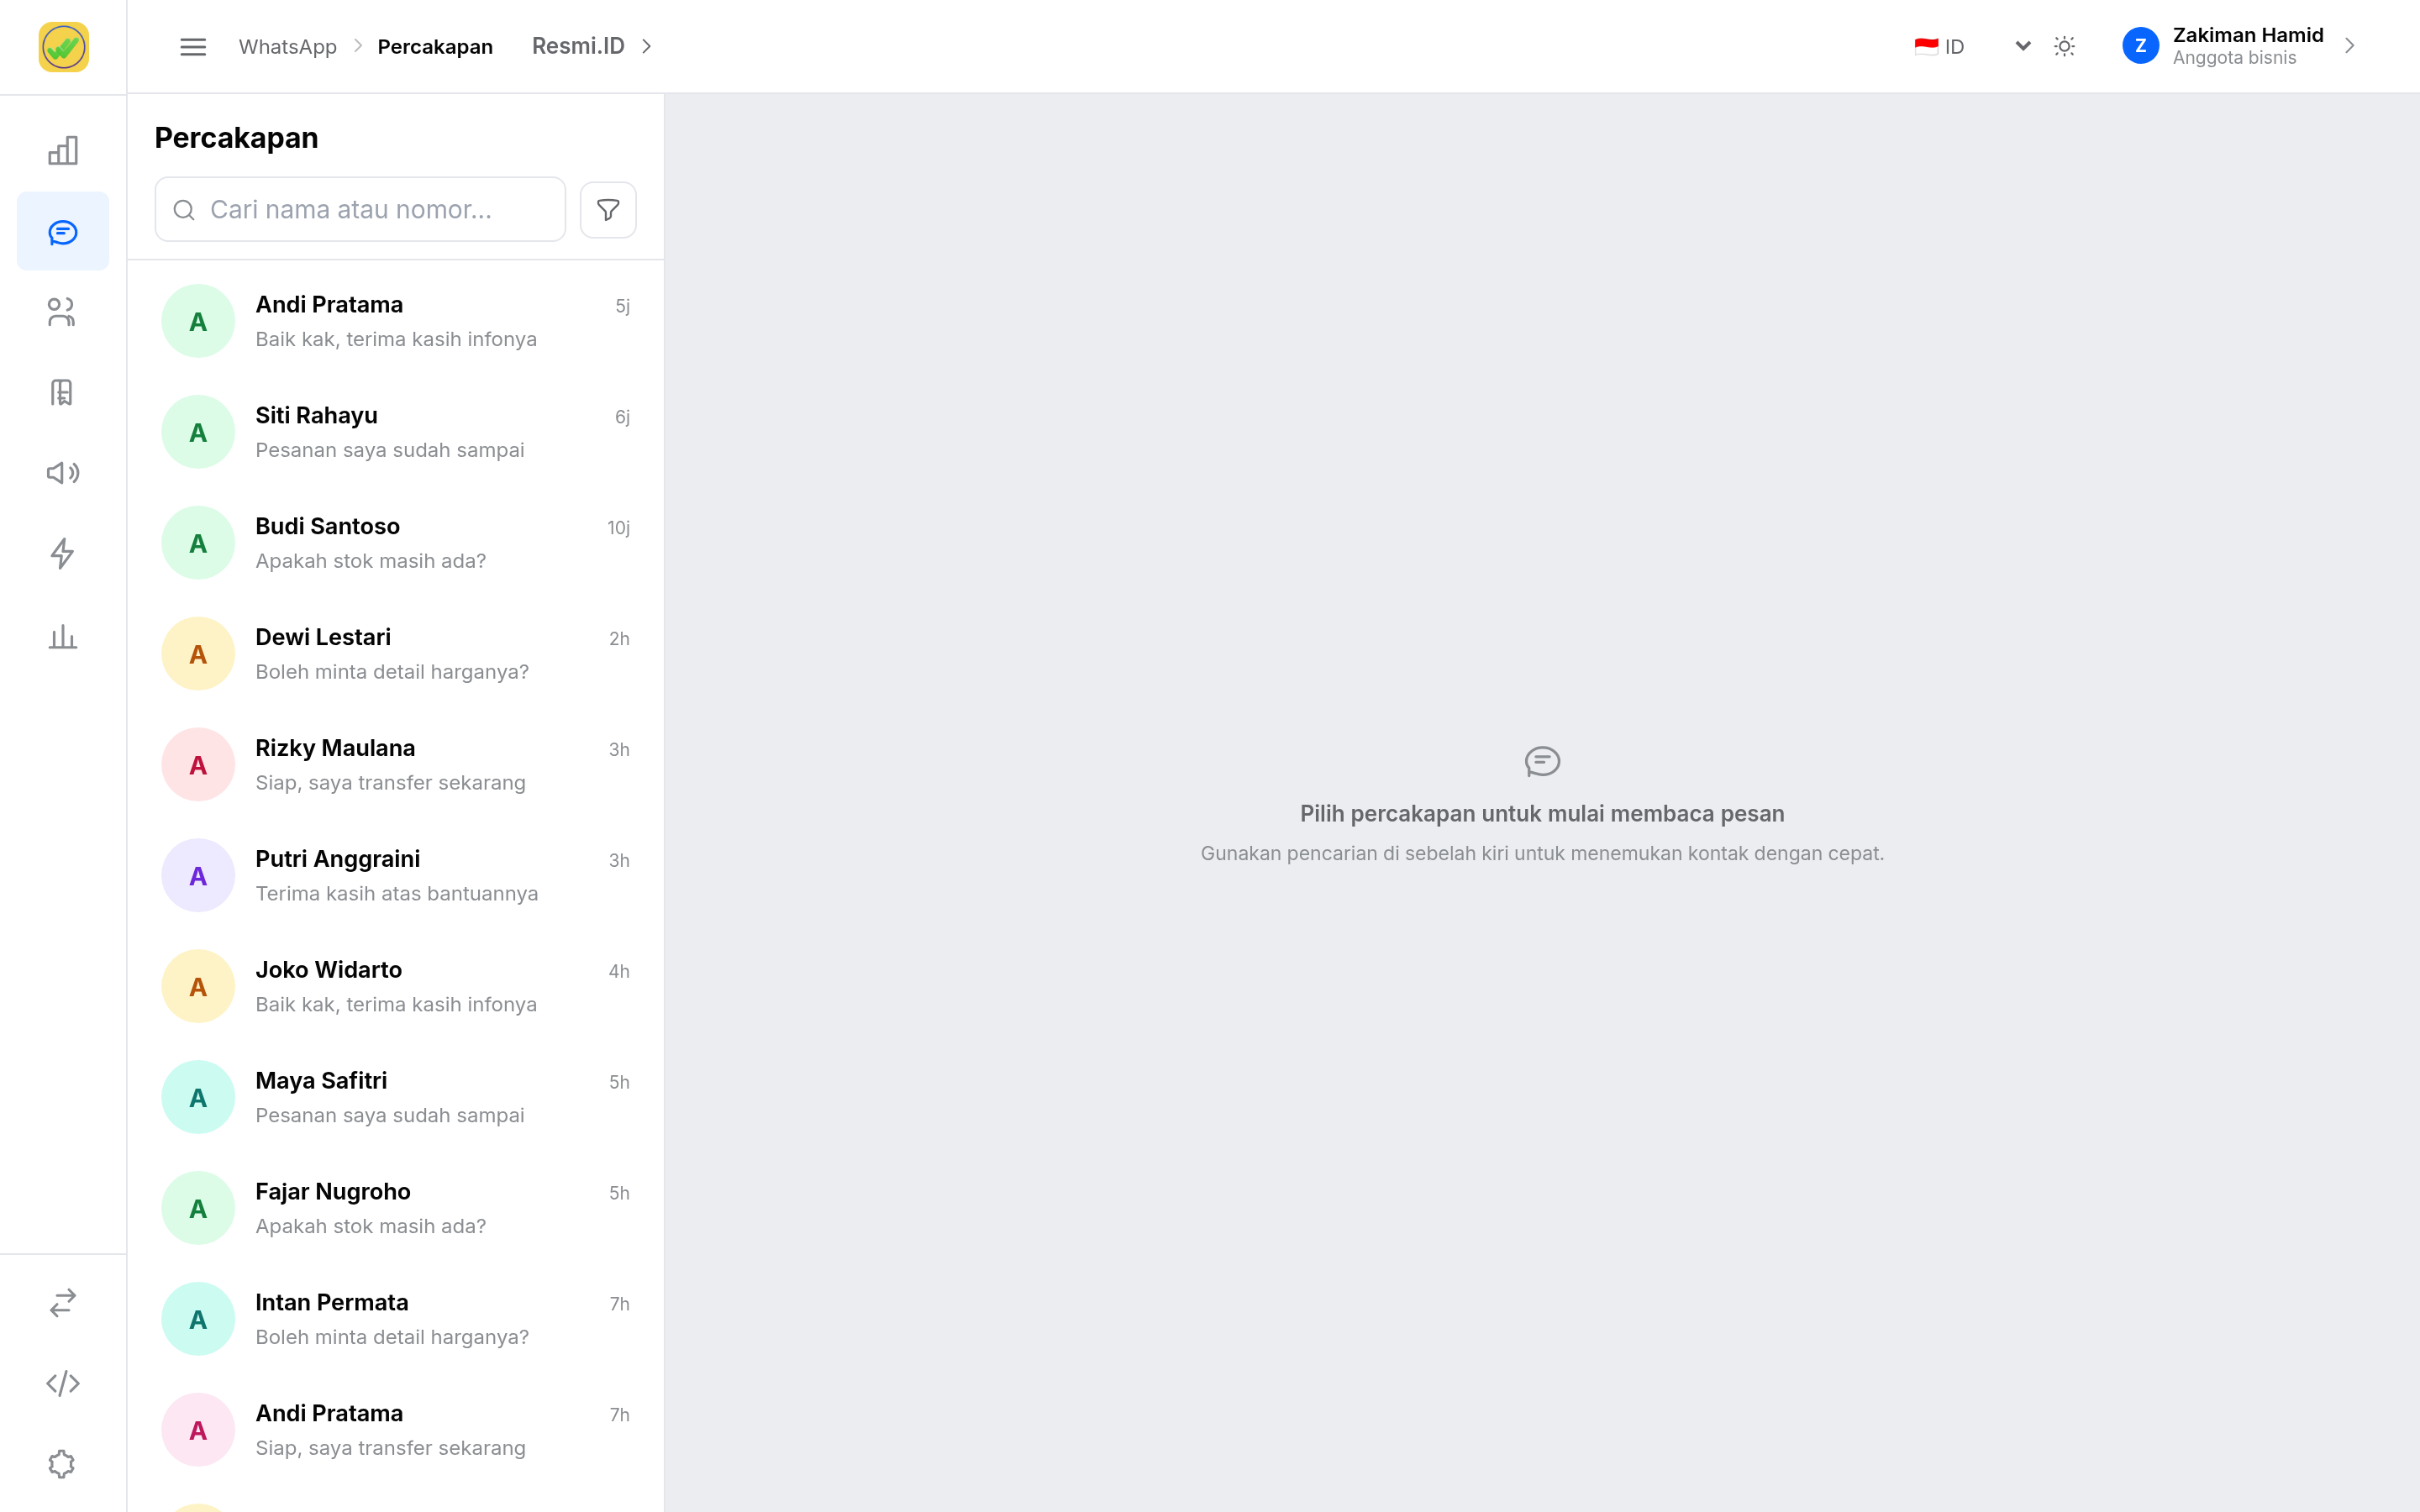
- Find a customer through the Search name or number… field, or use the filter icon to narrow the conversations.
- Click a conversation to open its message history.
- Type your reply in the field at the bottom, then send.
- Need an answer you use often? Open Quick Replies to insert it in one click — they can be added, edited, and deleted through Manage Quick Replies.
- Other available buttons: Send Template Message, Send Contact Card, and Send Location.
Contacts
Your customer database — the source of recipients when you send a broadcast.
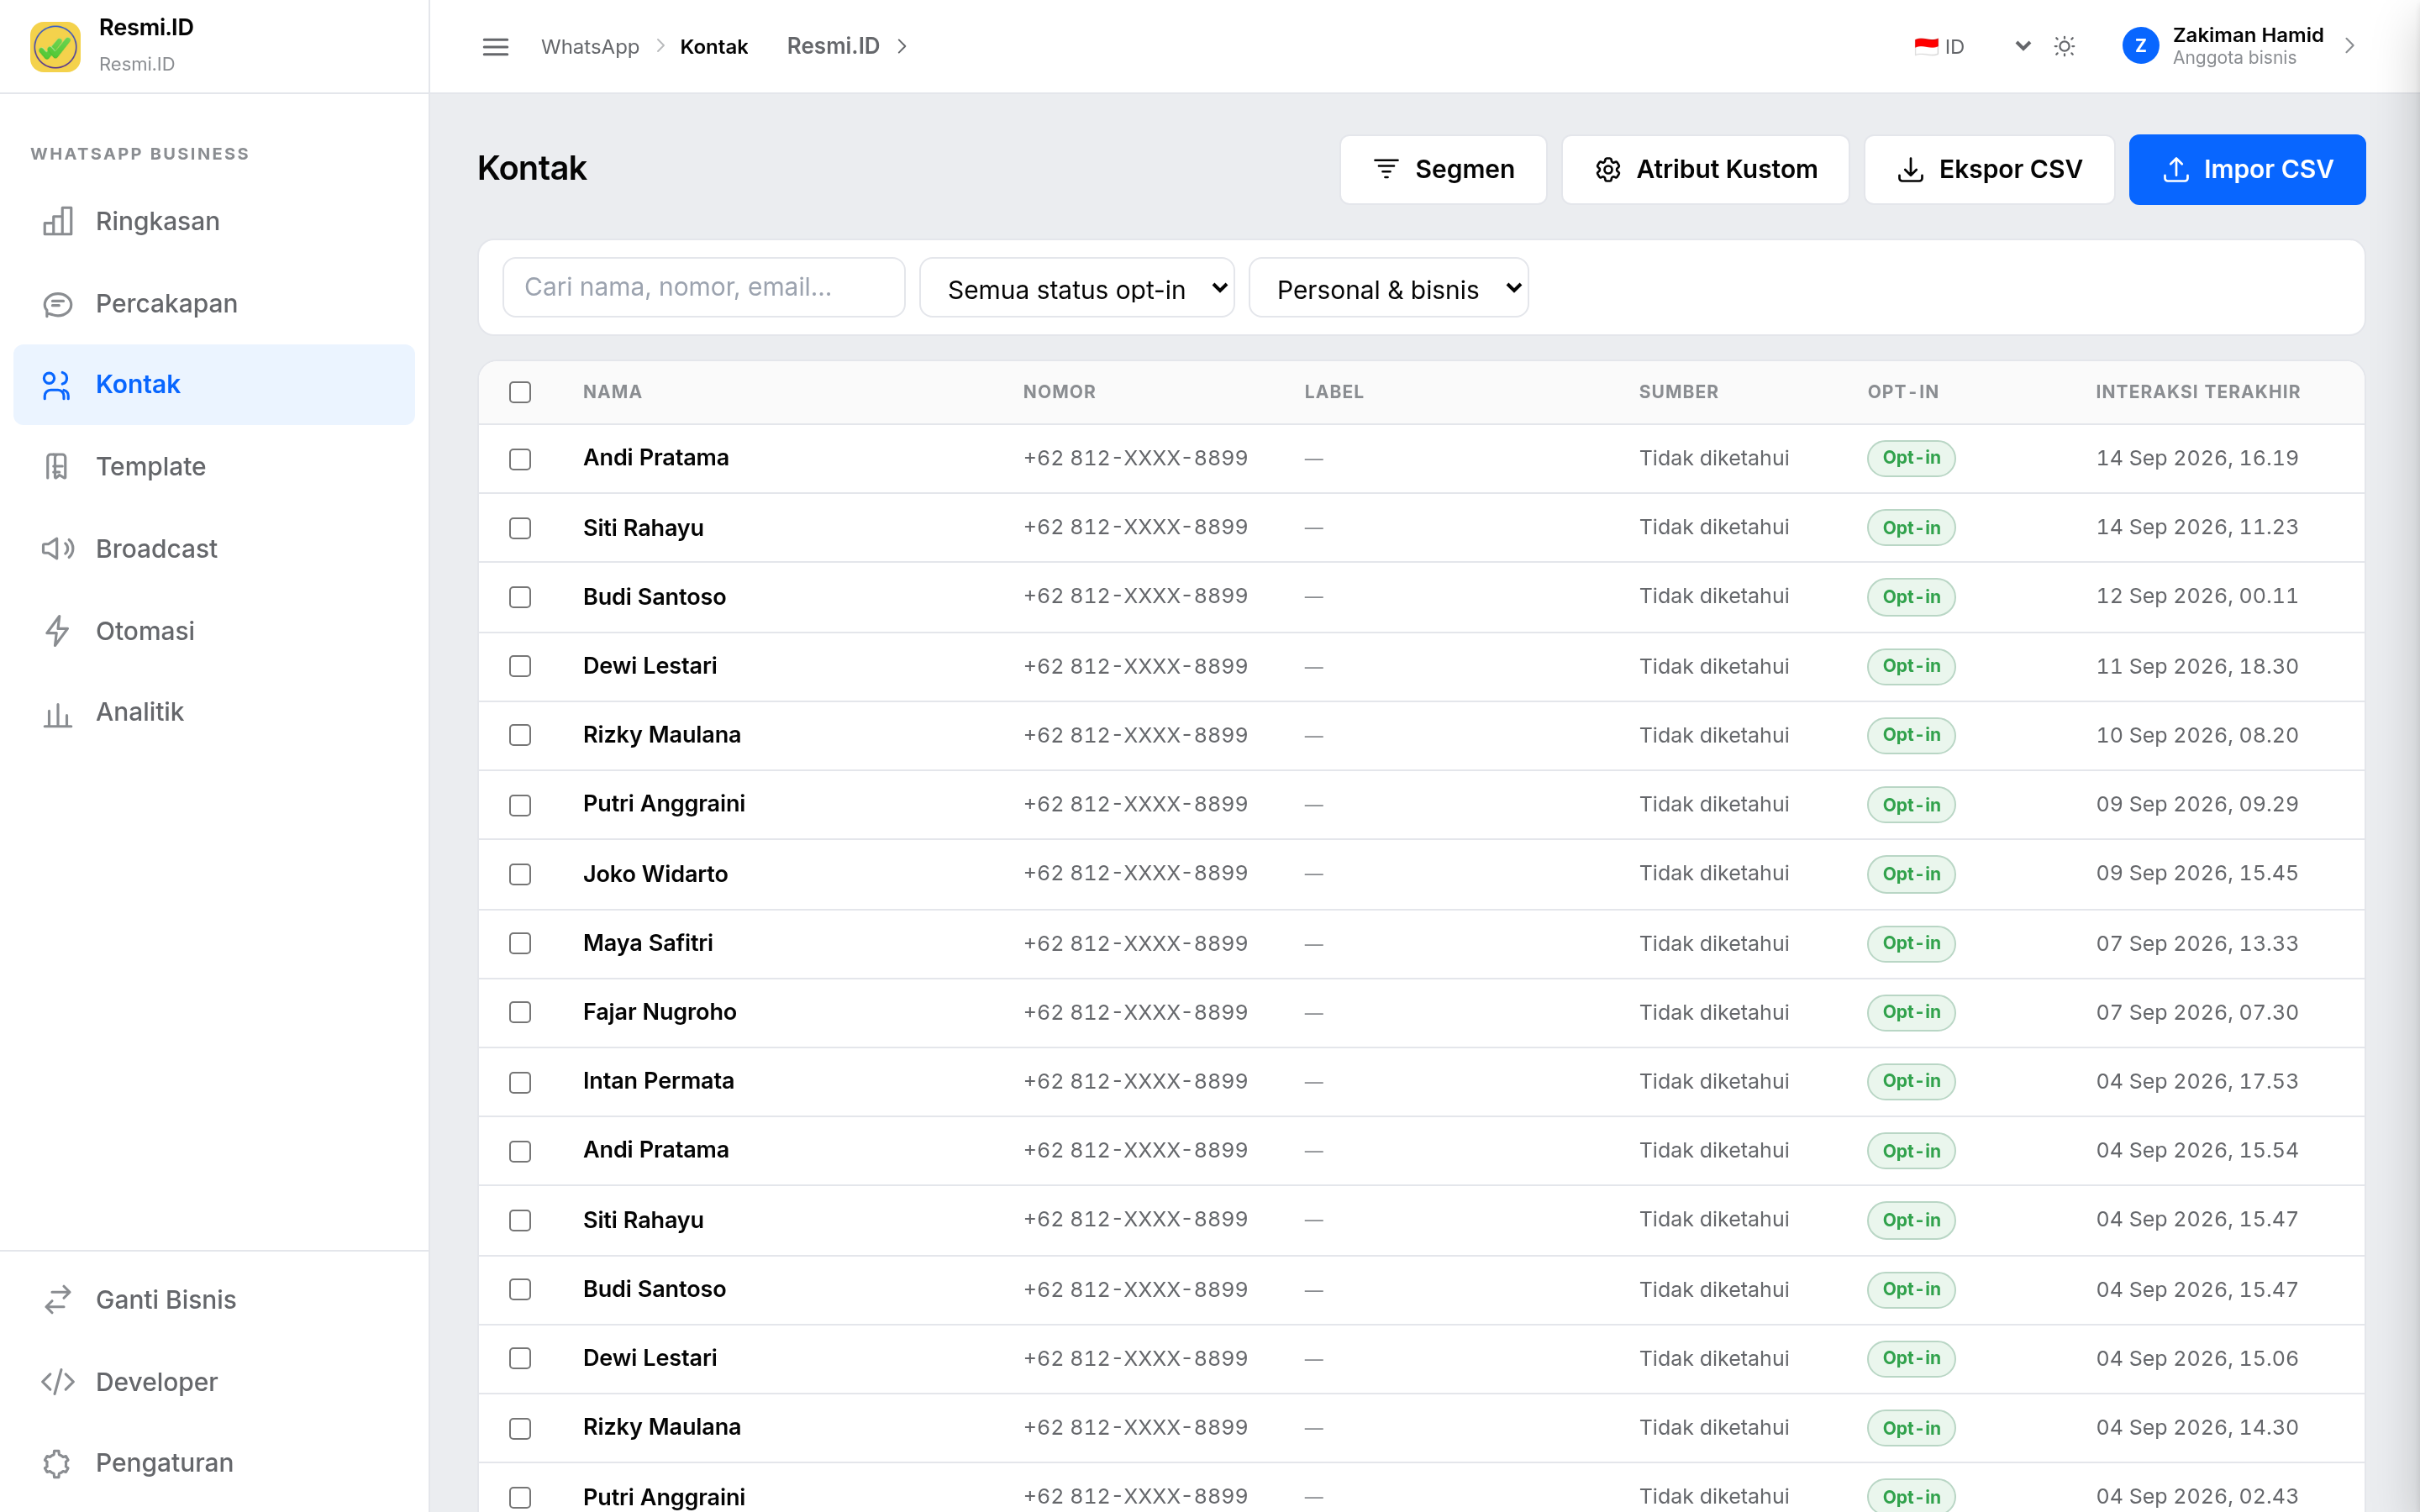
- Search contacts by name, number, or email; filter by opt-in status and the Personal & business type.
- Click Import CSV to add contacts in bulk, or Export CSV to download your data.
- Use Custom Attributes when you want to store extra data, such as city, plan type, or join date.
- Tick several contacts for bulk actions such as Delete Selected.
Contact Segments
Growth & BusinessGroup contacts by certain conditions so your broadcast lands on target.
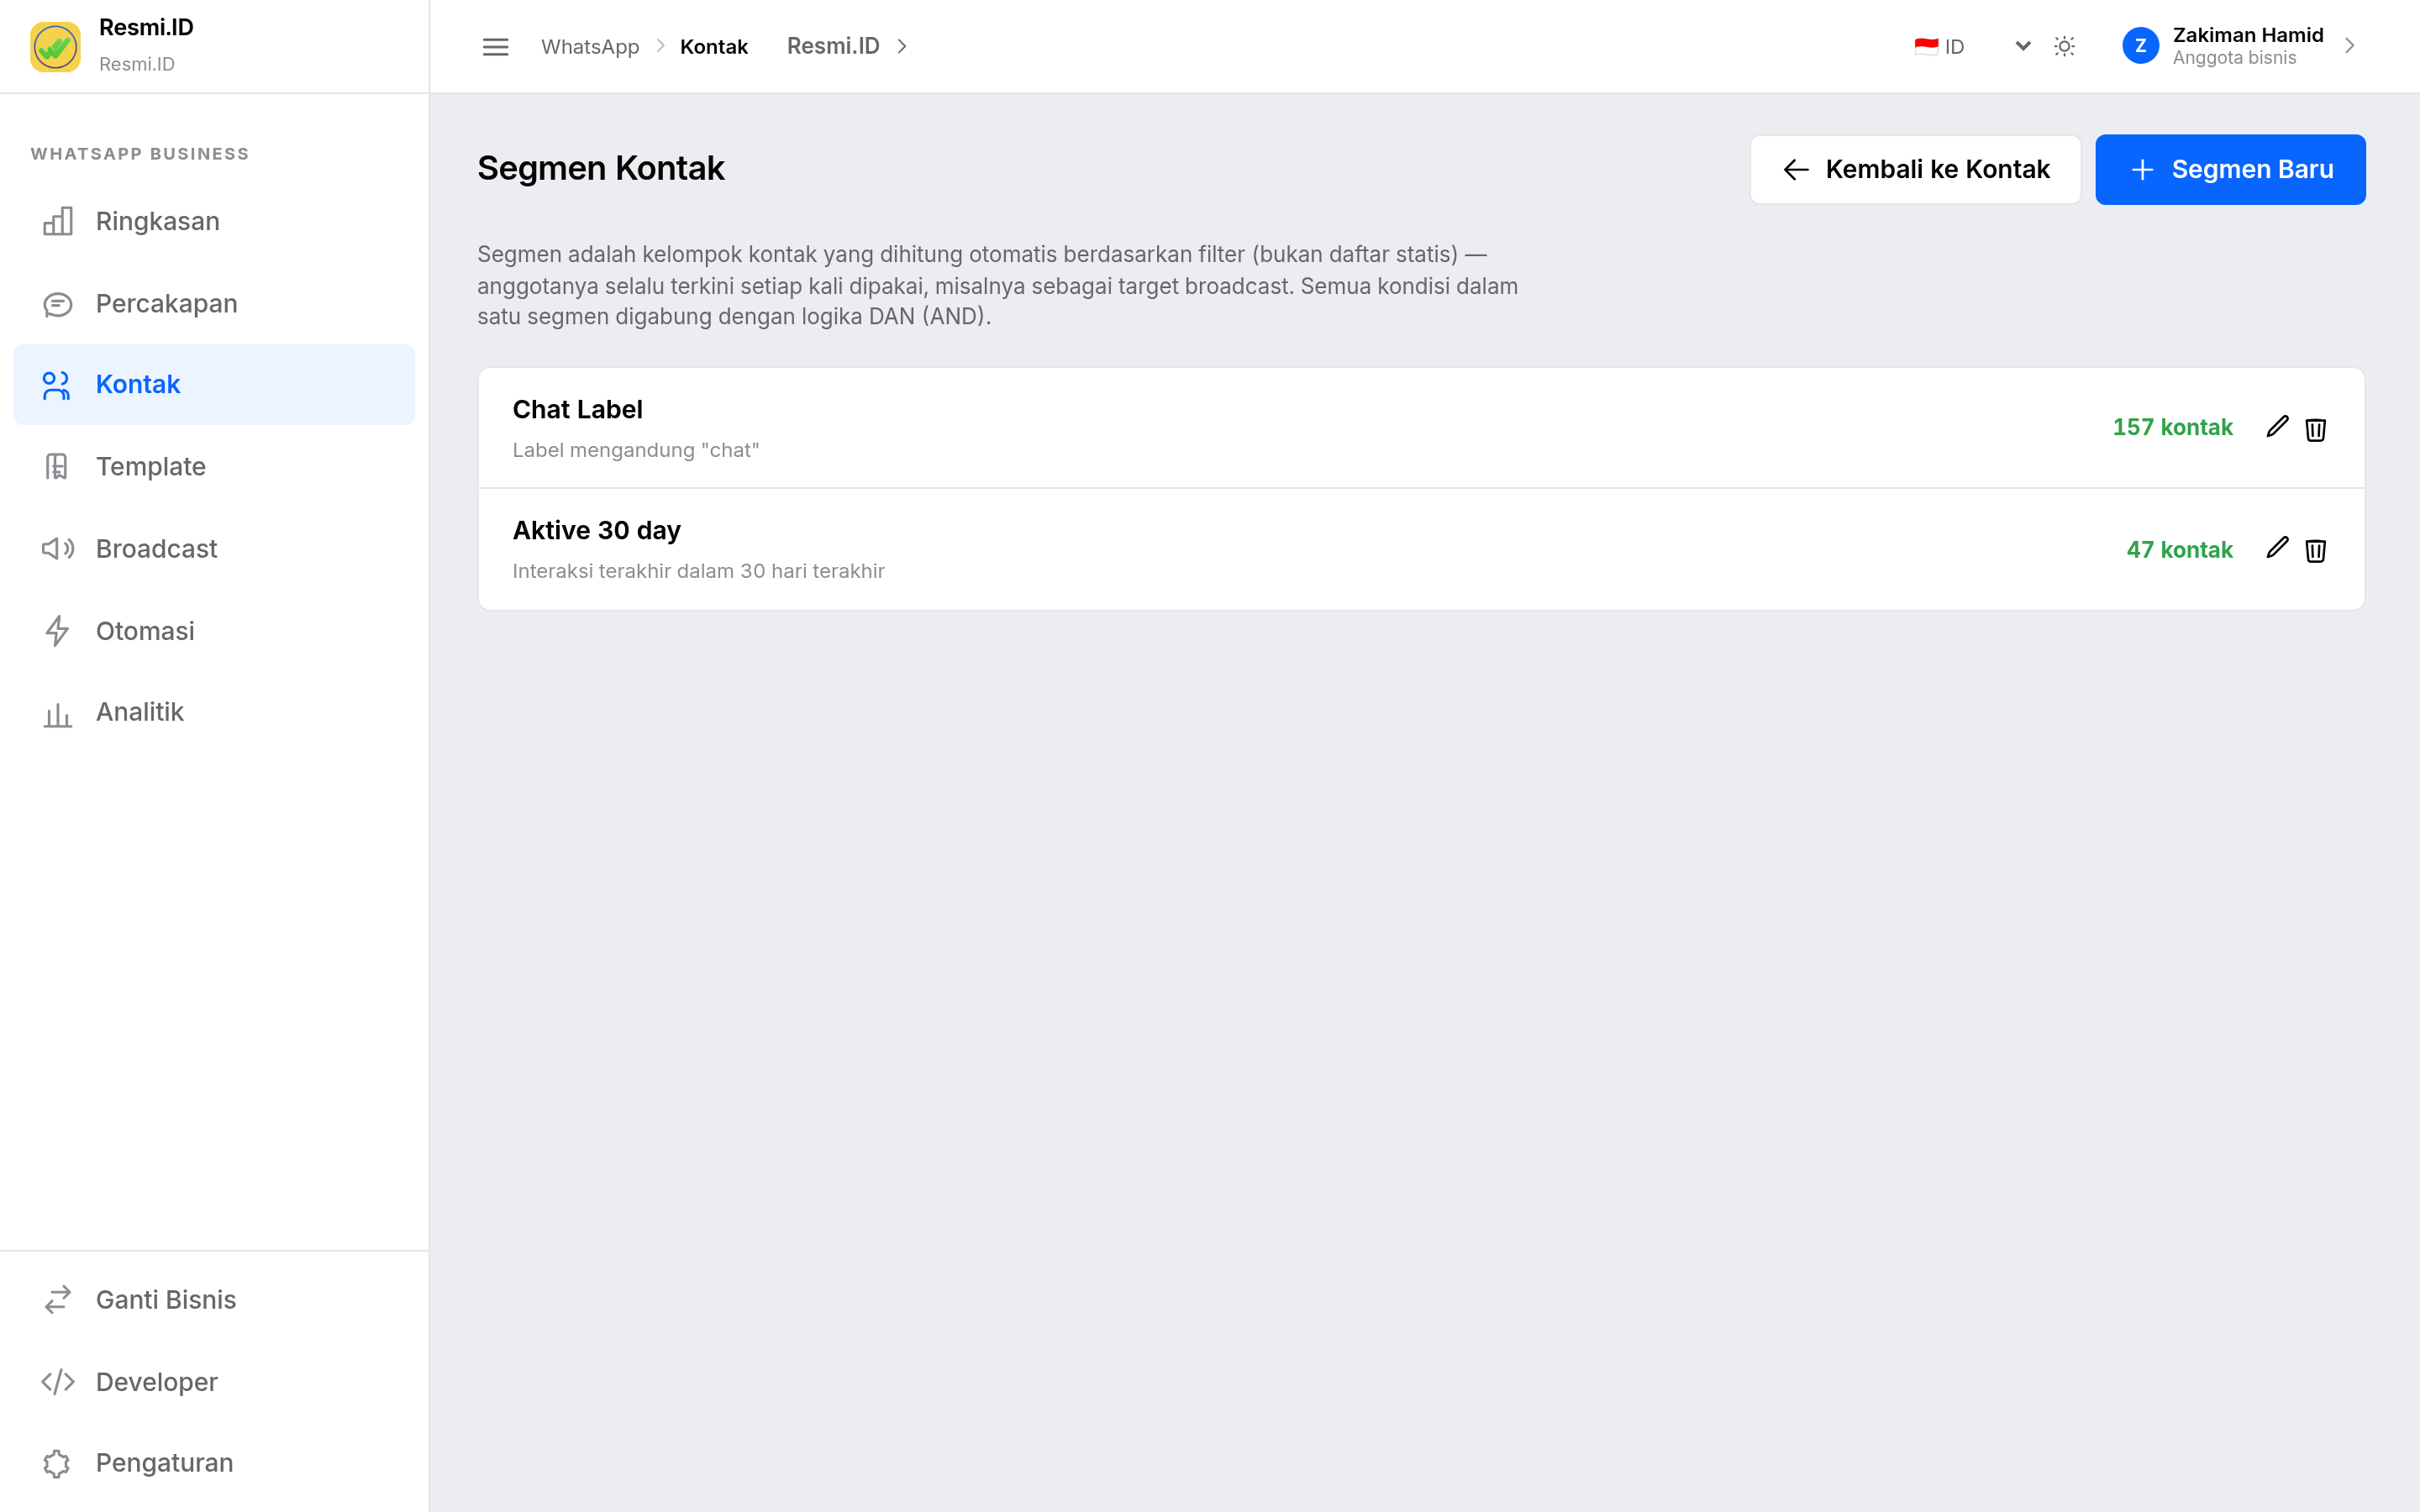
- Click New Segment, then give it a clear name, for example "Jakarta customers active in 30 days".
- Click Add Condition and set the criteria. Several conditions can be combined at once.
- Press Count Matching Contacts to see the number of recipients before saving.
- Click Save Segment. This segment can then be picked directly when you create a broadcast.
Message Templates
The list of all your templates along with their review status at Meta.
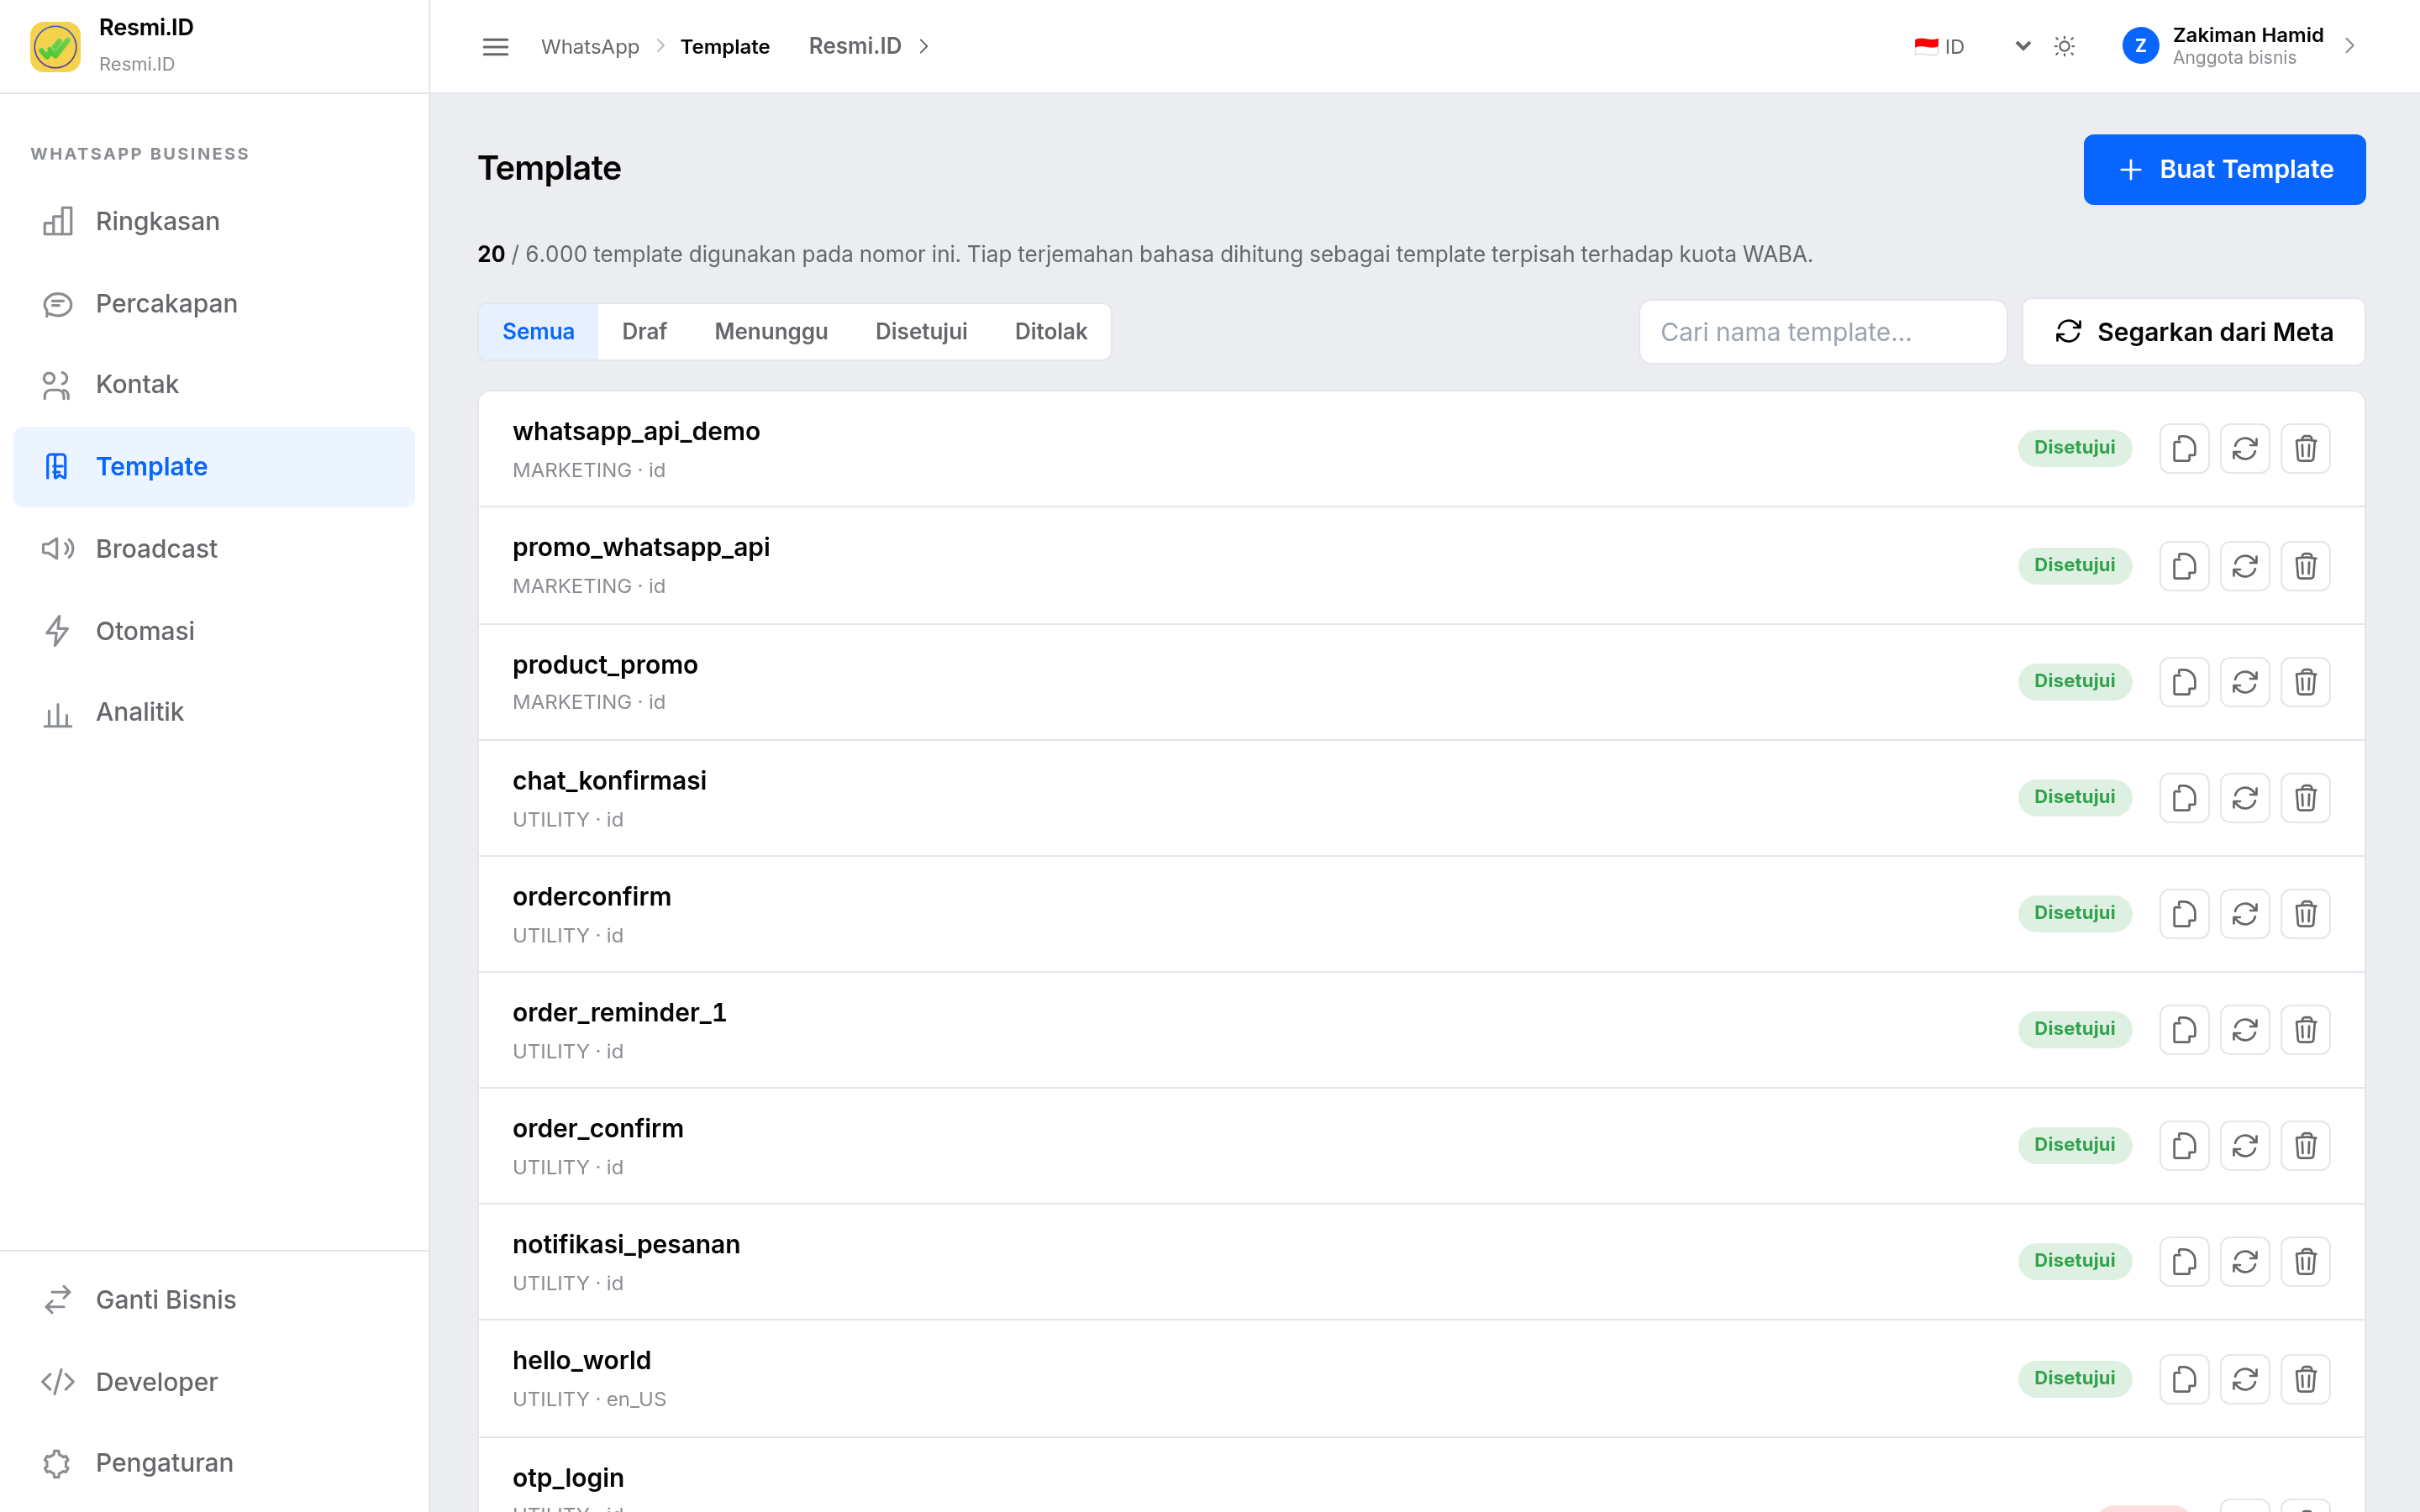
- Draft — still being written by you, not yet submitted to Meta.
- Pending — under review by Meta. Usually a few minutes to a few hours.
- Approved — ready to use for broadcast and for starting new conversations.
- Rejected — needs fixing and resubmitting. The rejection reason can be seen in the template detail.
Creating a Template
Build the template, then submit it to Meta for review.
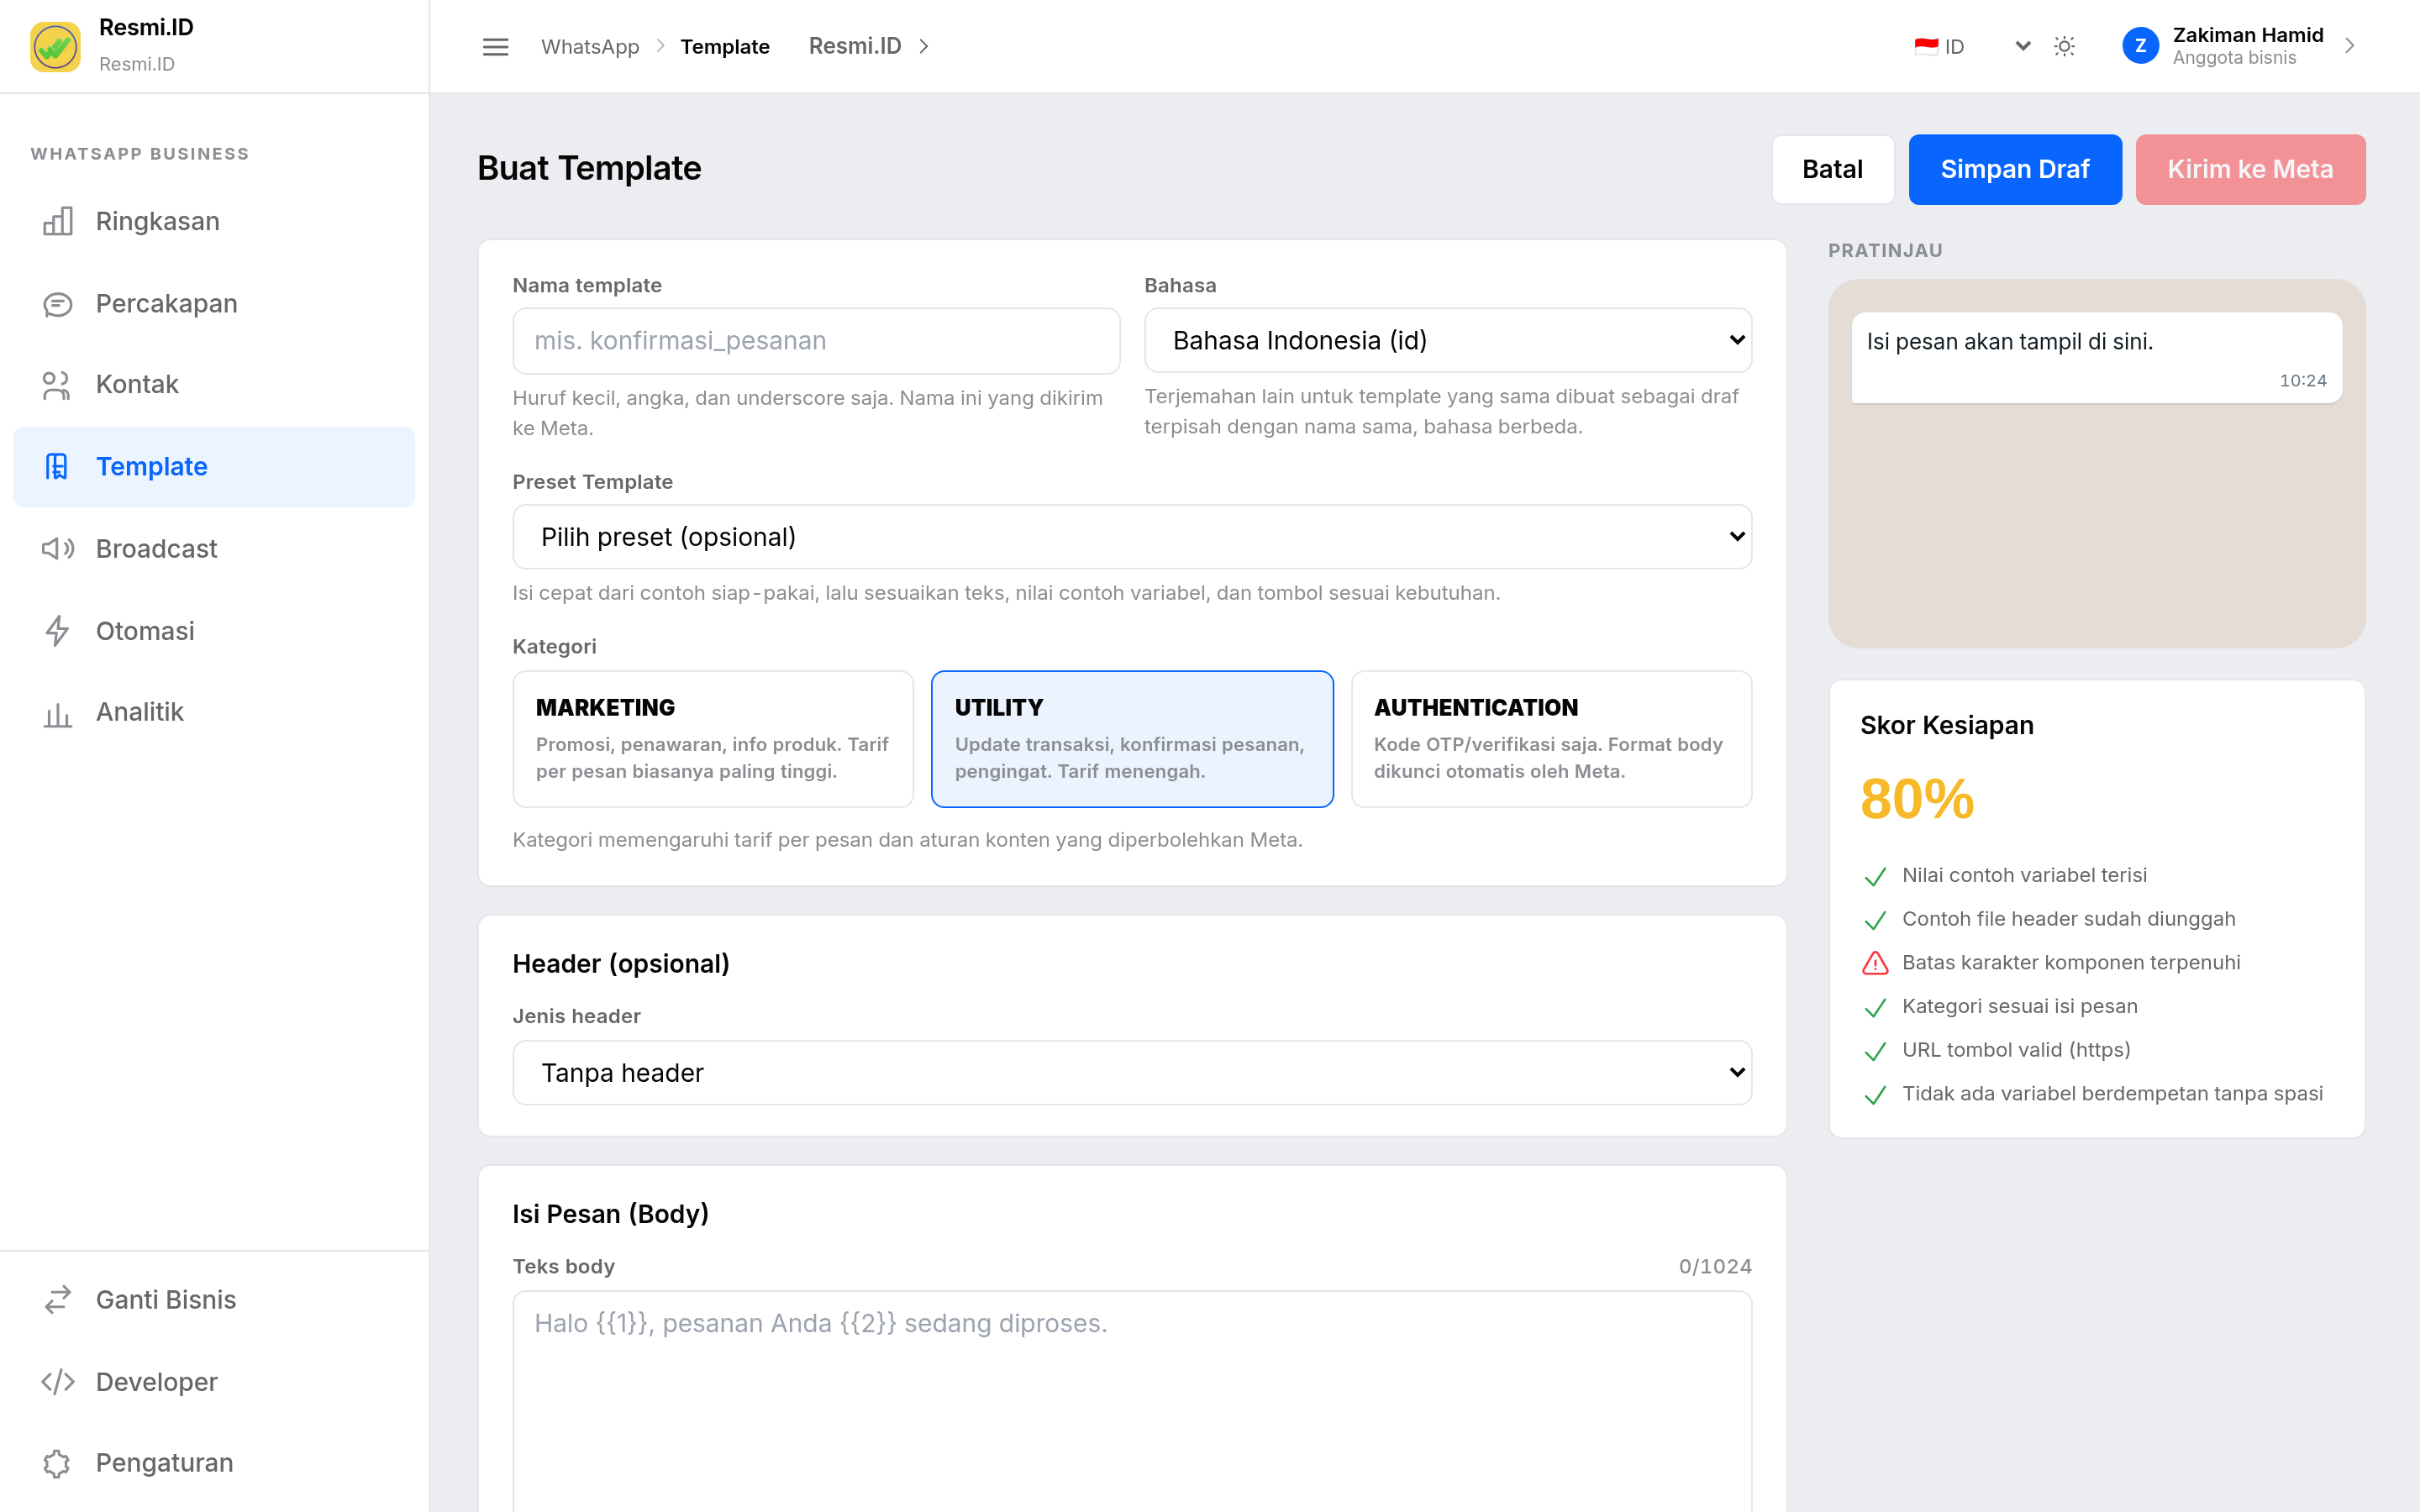
- Pick the category that matches the message content: Utility (transaction notifications), Marketing (promotions), or Authentication (OTP).
- Fill in the Header if needed — it can be text, an image, or a document. This part is optional.
- Write the Body. Use variables such as {{1}} for the parts that change, for example the customer's name.
- Add a Footer and Buttons if required (optional).
- Pay attention to the Readiness Score beside it — this guidance helps reduce the chance of the template being rejected.
- Click Save Draft to store it, or Send to Meta to submit it for review.
Broadcast
Growth & BusinessThe list of all your bulk-sending campaigns along with their status.
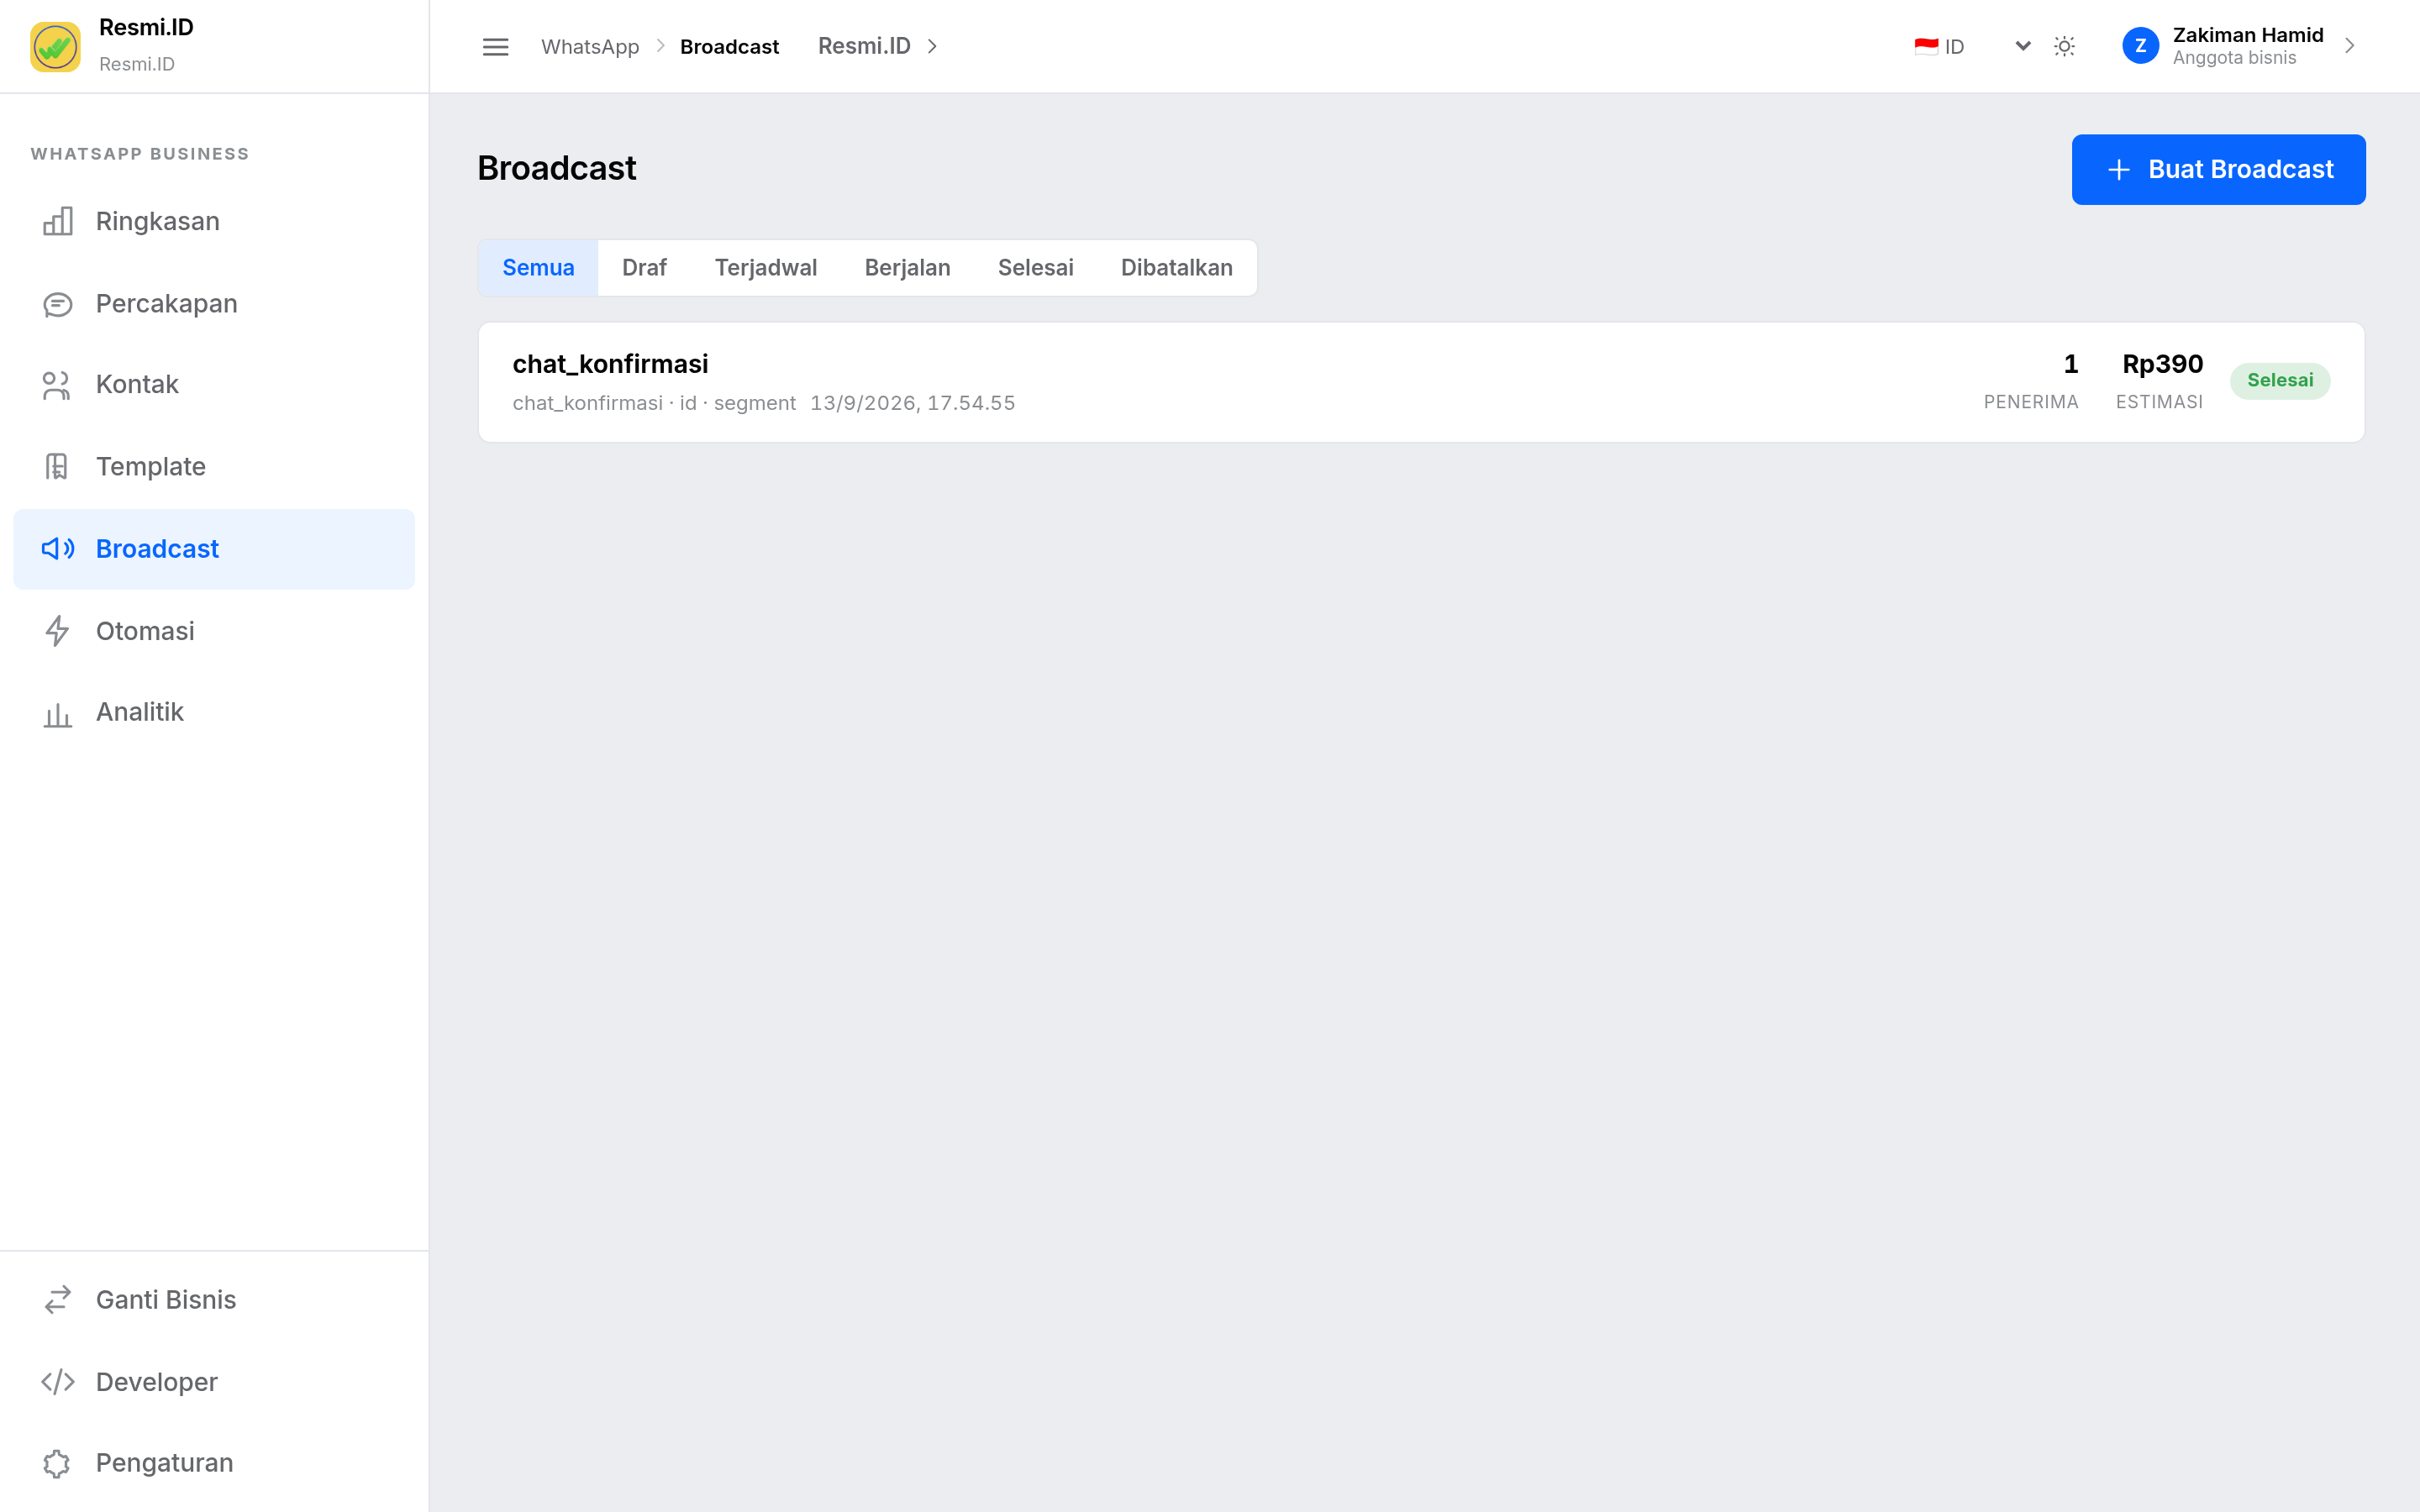
- Click any broadcast to see its detailed report: sent, failed, read.
- Use the status tabs to monitor campaigns that are Running or still Scheduled.
- Press Create Broadcast to start a new campaign.
Creating a Broadcast
Choose recipients, choose a template, review, then send or schedule.
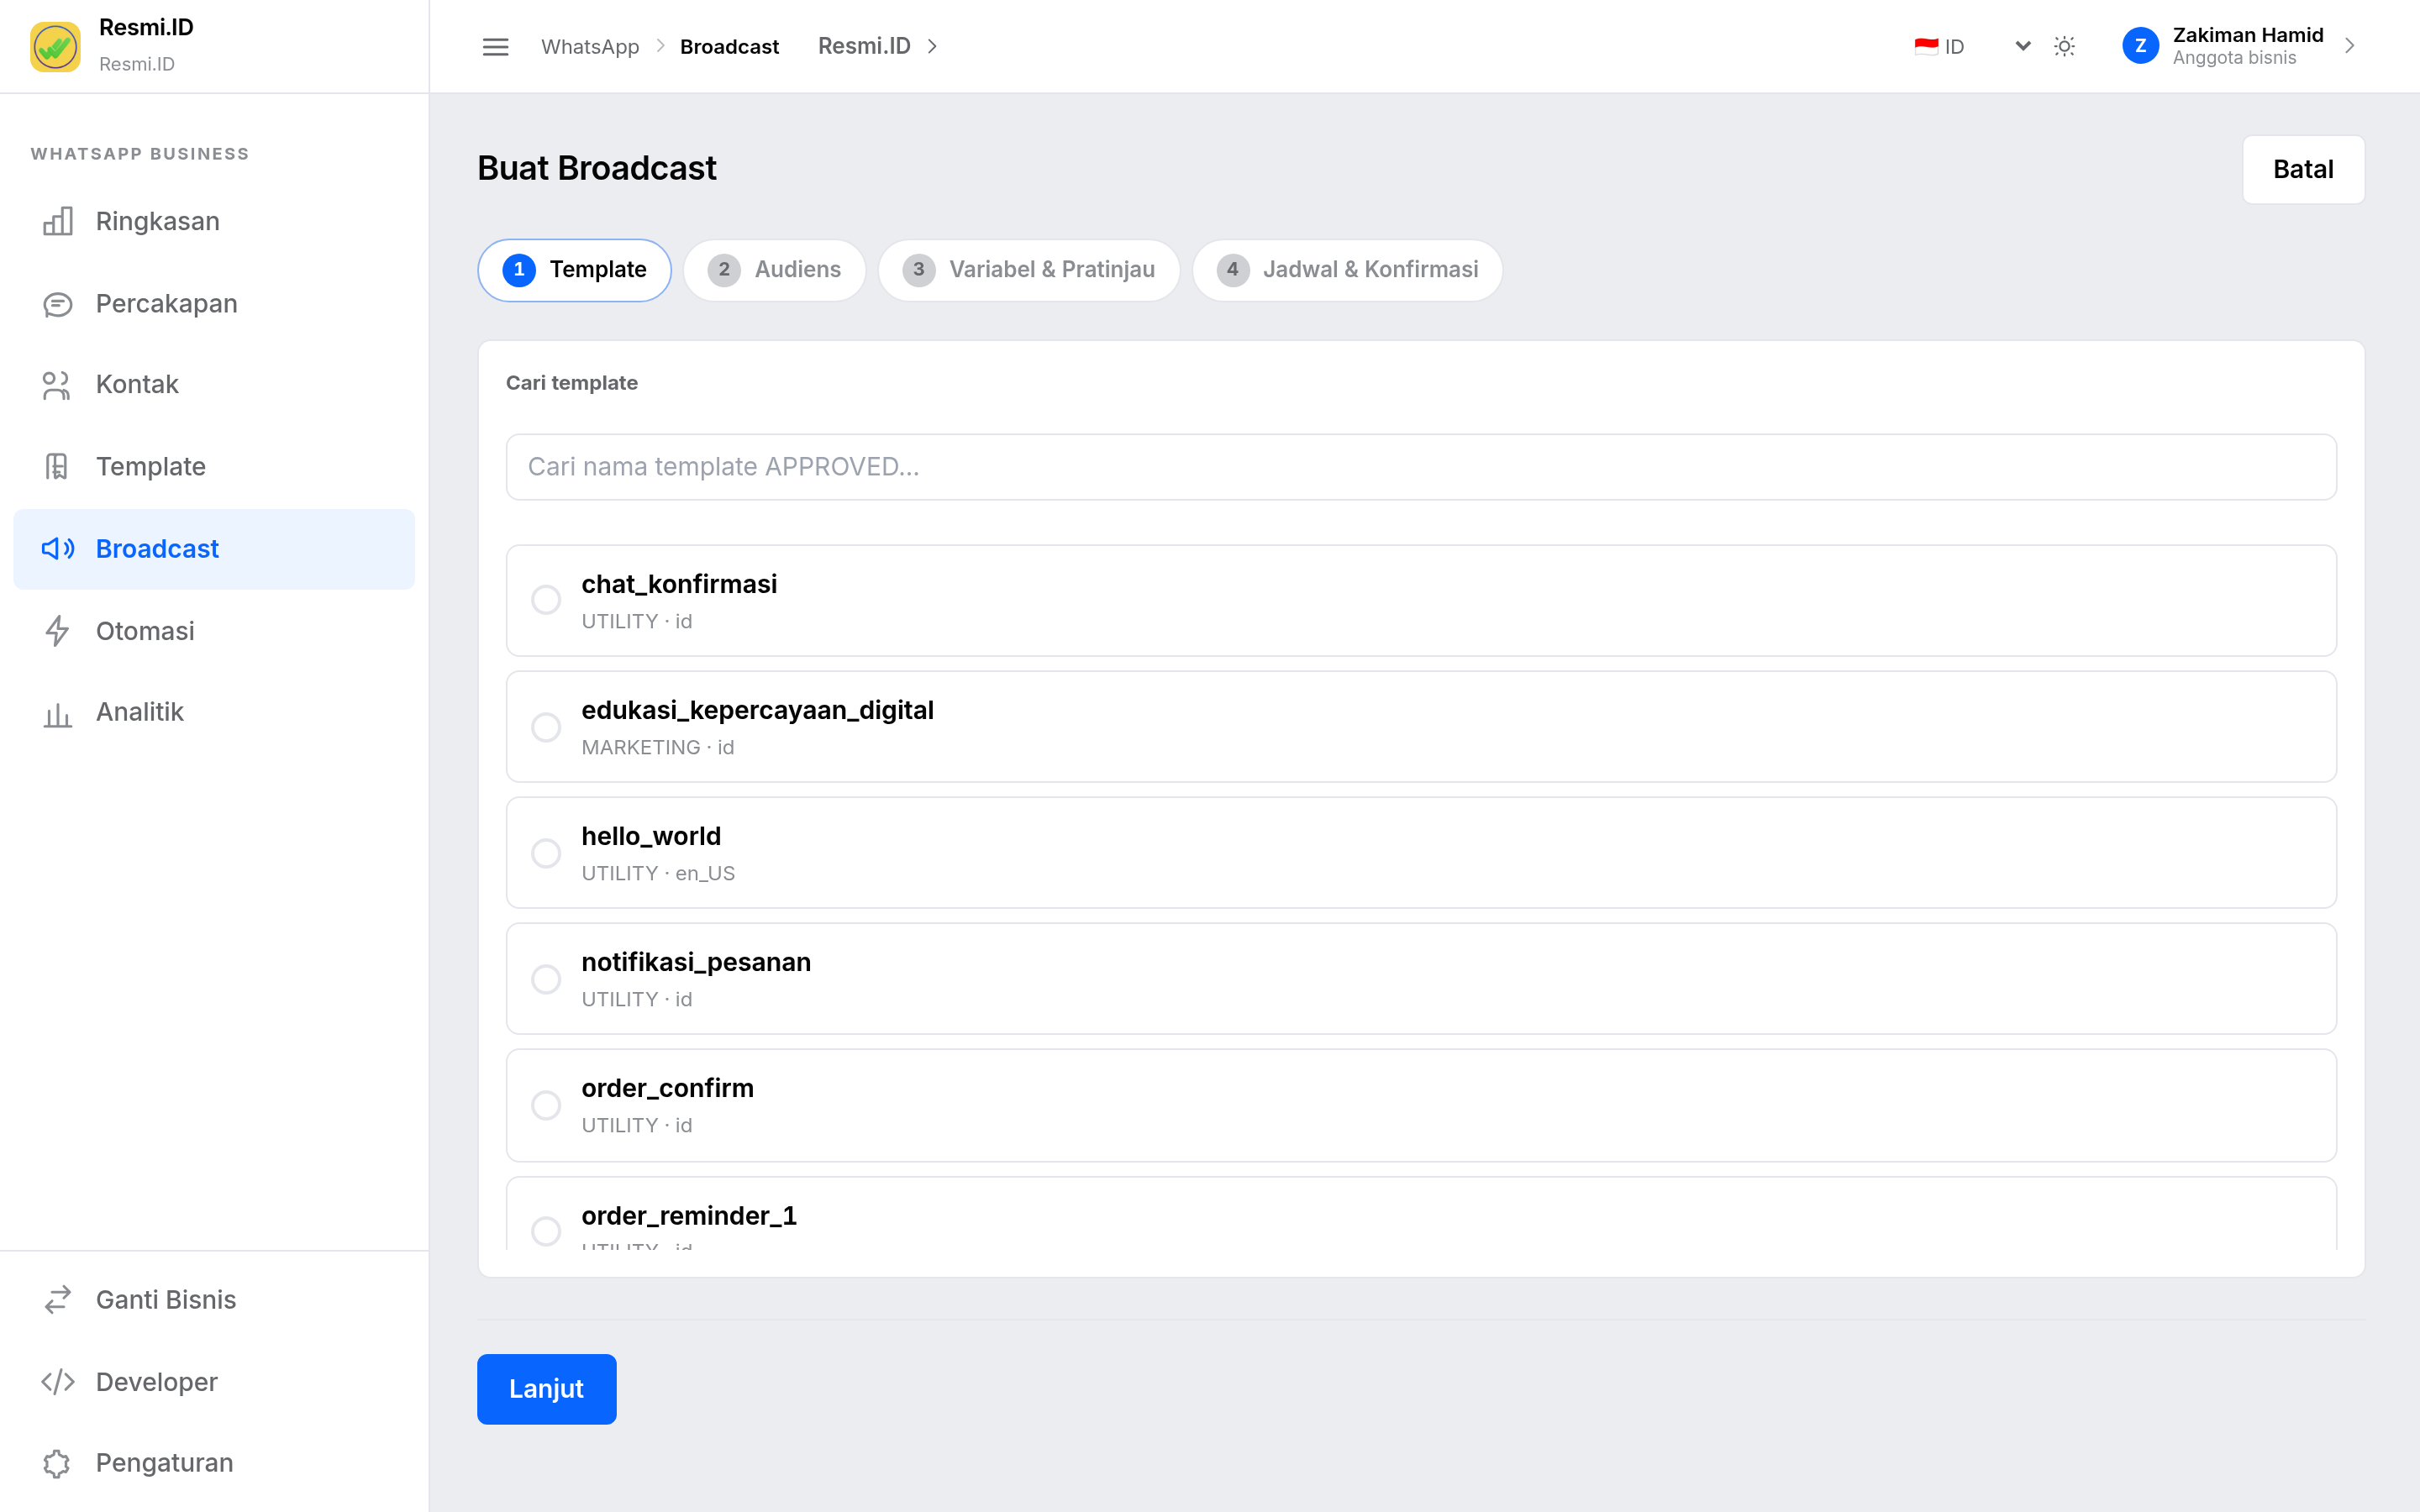
- Decide the recipient source: a Segment you already built, Upload List via Excel, Manual Filter, or 1 Contact for a test run.
- Pick a template that Meta has Approved, then fill in its variable values if any.
- Check the Confirm Before Sending panel — this is where you see the recipient count and the estimated cost.
- Send now, or schedule it for a specific time.
Automation
Reply to customers automatically, with no operator on duty.
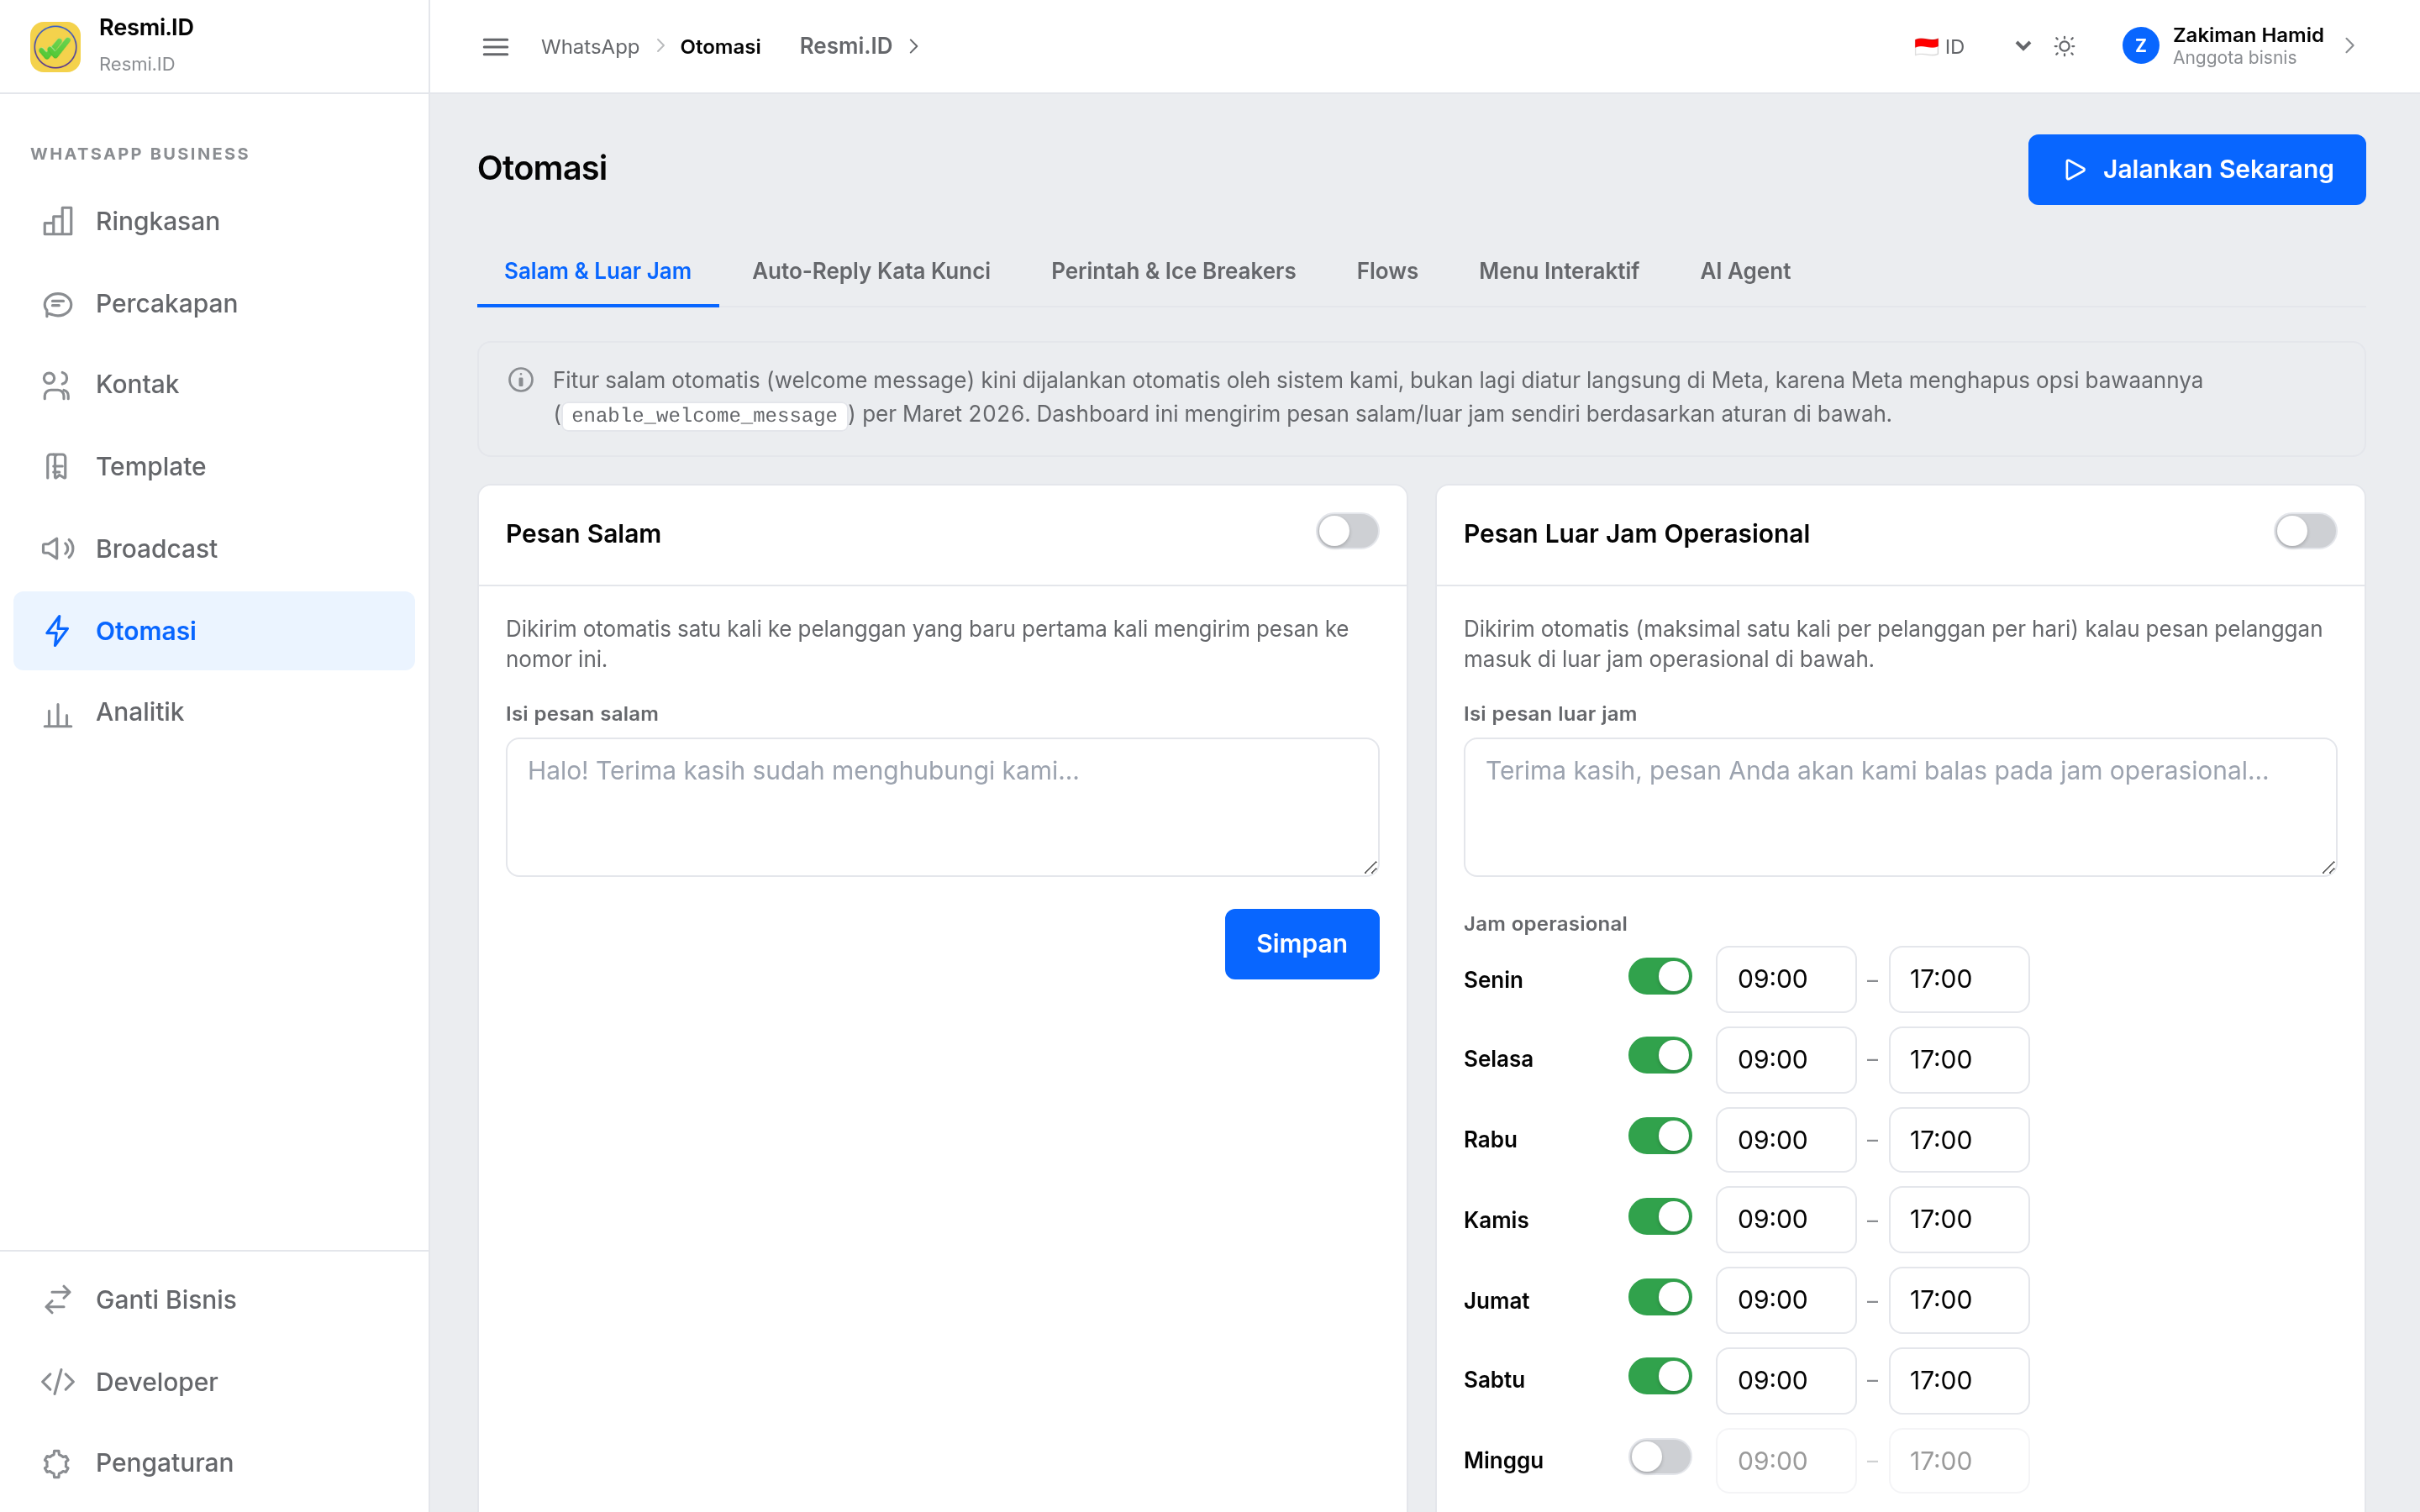
- Greeting & Away — the greeting is sent once to a customer contacting you for the first time. The away message is sent automatically when a chat arrives outside business hours; set opening hours per day, and switch the toggle off on holidays.
- Keyword Auto-Reply — reply automatically when a customer's message contains a certain word, for example "price" or "location".
- Commands & Ice Breakers — a command menu (up to 30) and conversation-opening buttons (up to 4) shown at the start of a chat.
- Flows — interactive forms inside WhatsApp, a good fit for registration or ordering. Growth & Business
- Interactive Menu — a numbered list of options the customer can tap.
- AI Agent — AI-based automatic replies for questions that vary widely.
Analytics
Measure messaging performance and keep an eye on running costs.
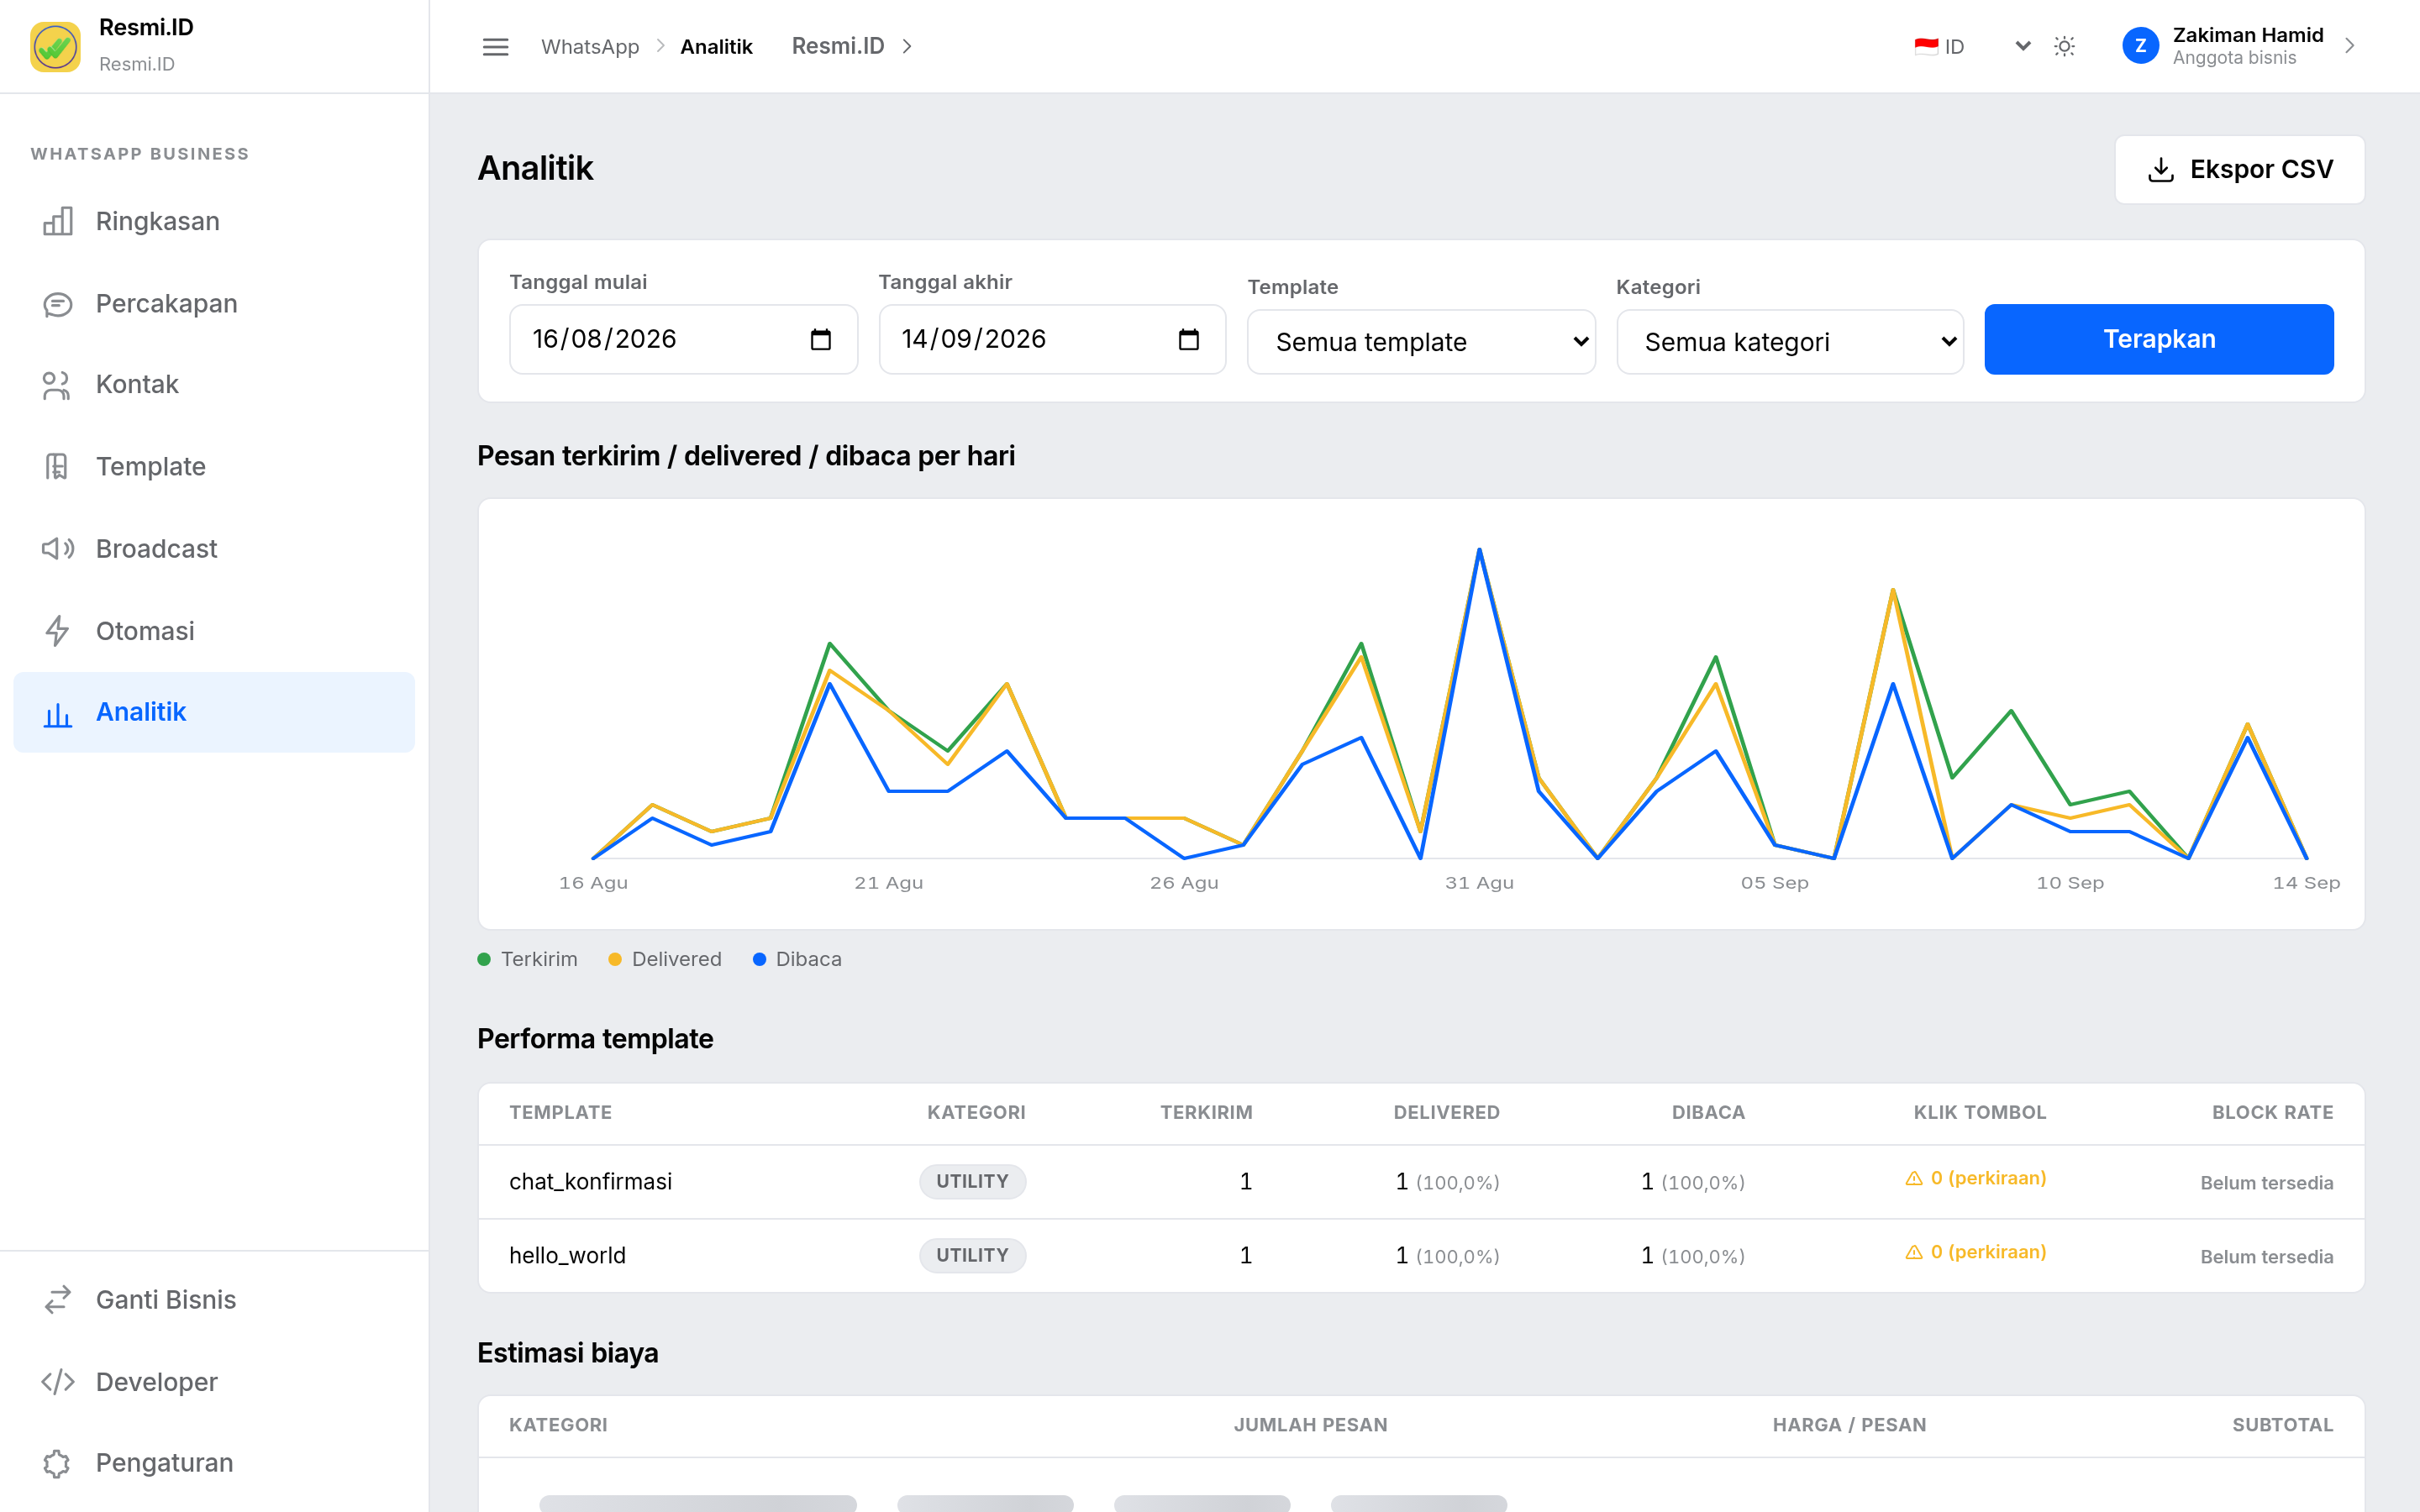
- Set the date range, then click Apply.
- Read the sent / delivered / read per day chart to see the trend.
- Open Template performance to find out which template is read the most.
- Check Estimated cost to keep spending under control.
- Click Export CSV if you want to work the data in Excel. Growth & Business
Settings
The hub for managing numbers, the business profile, team members, and billing.
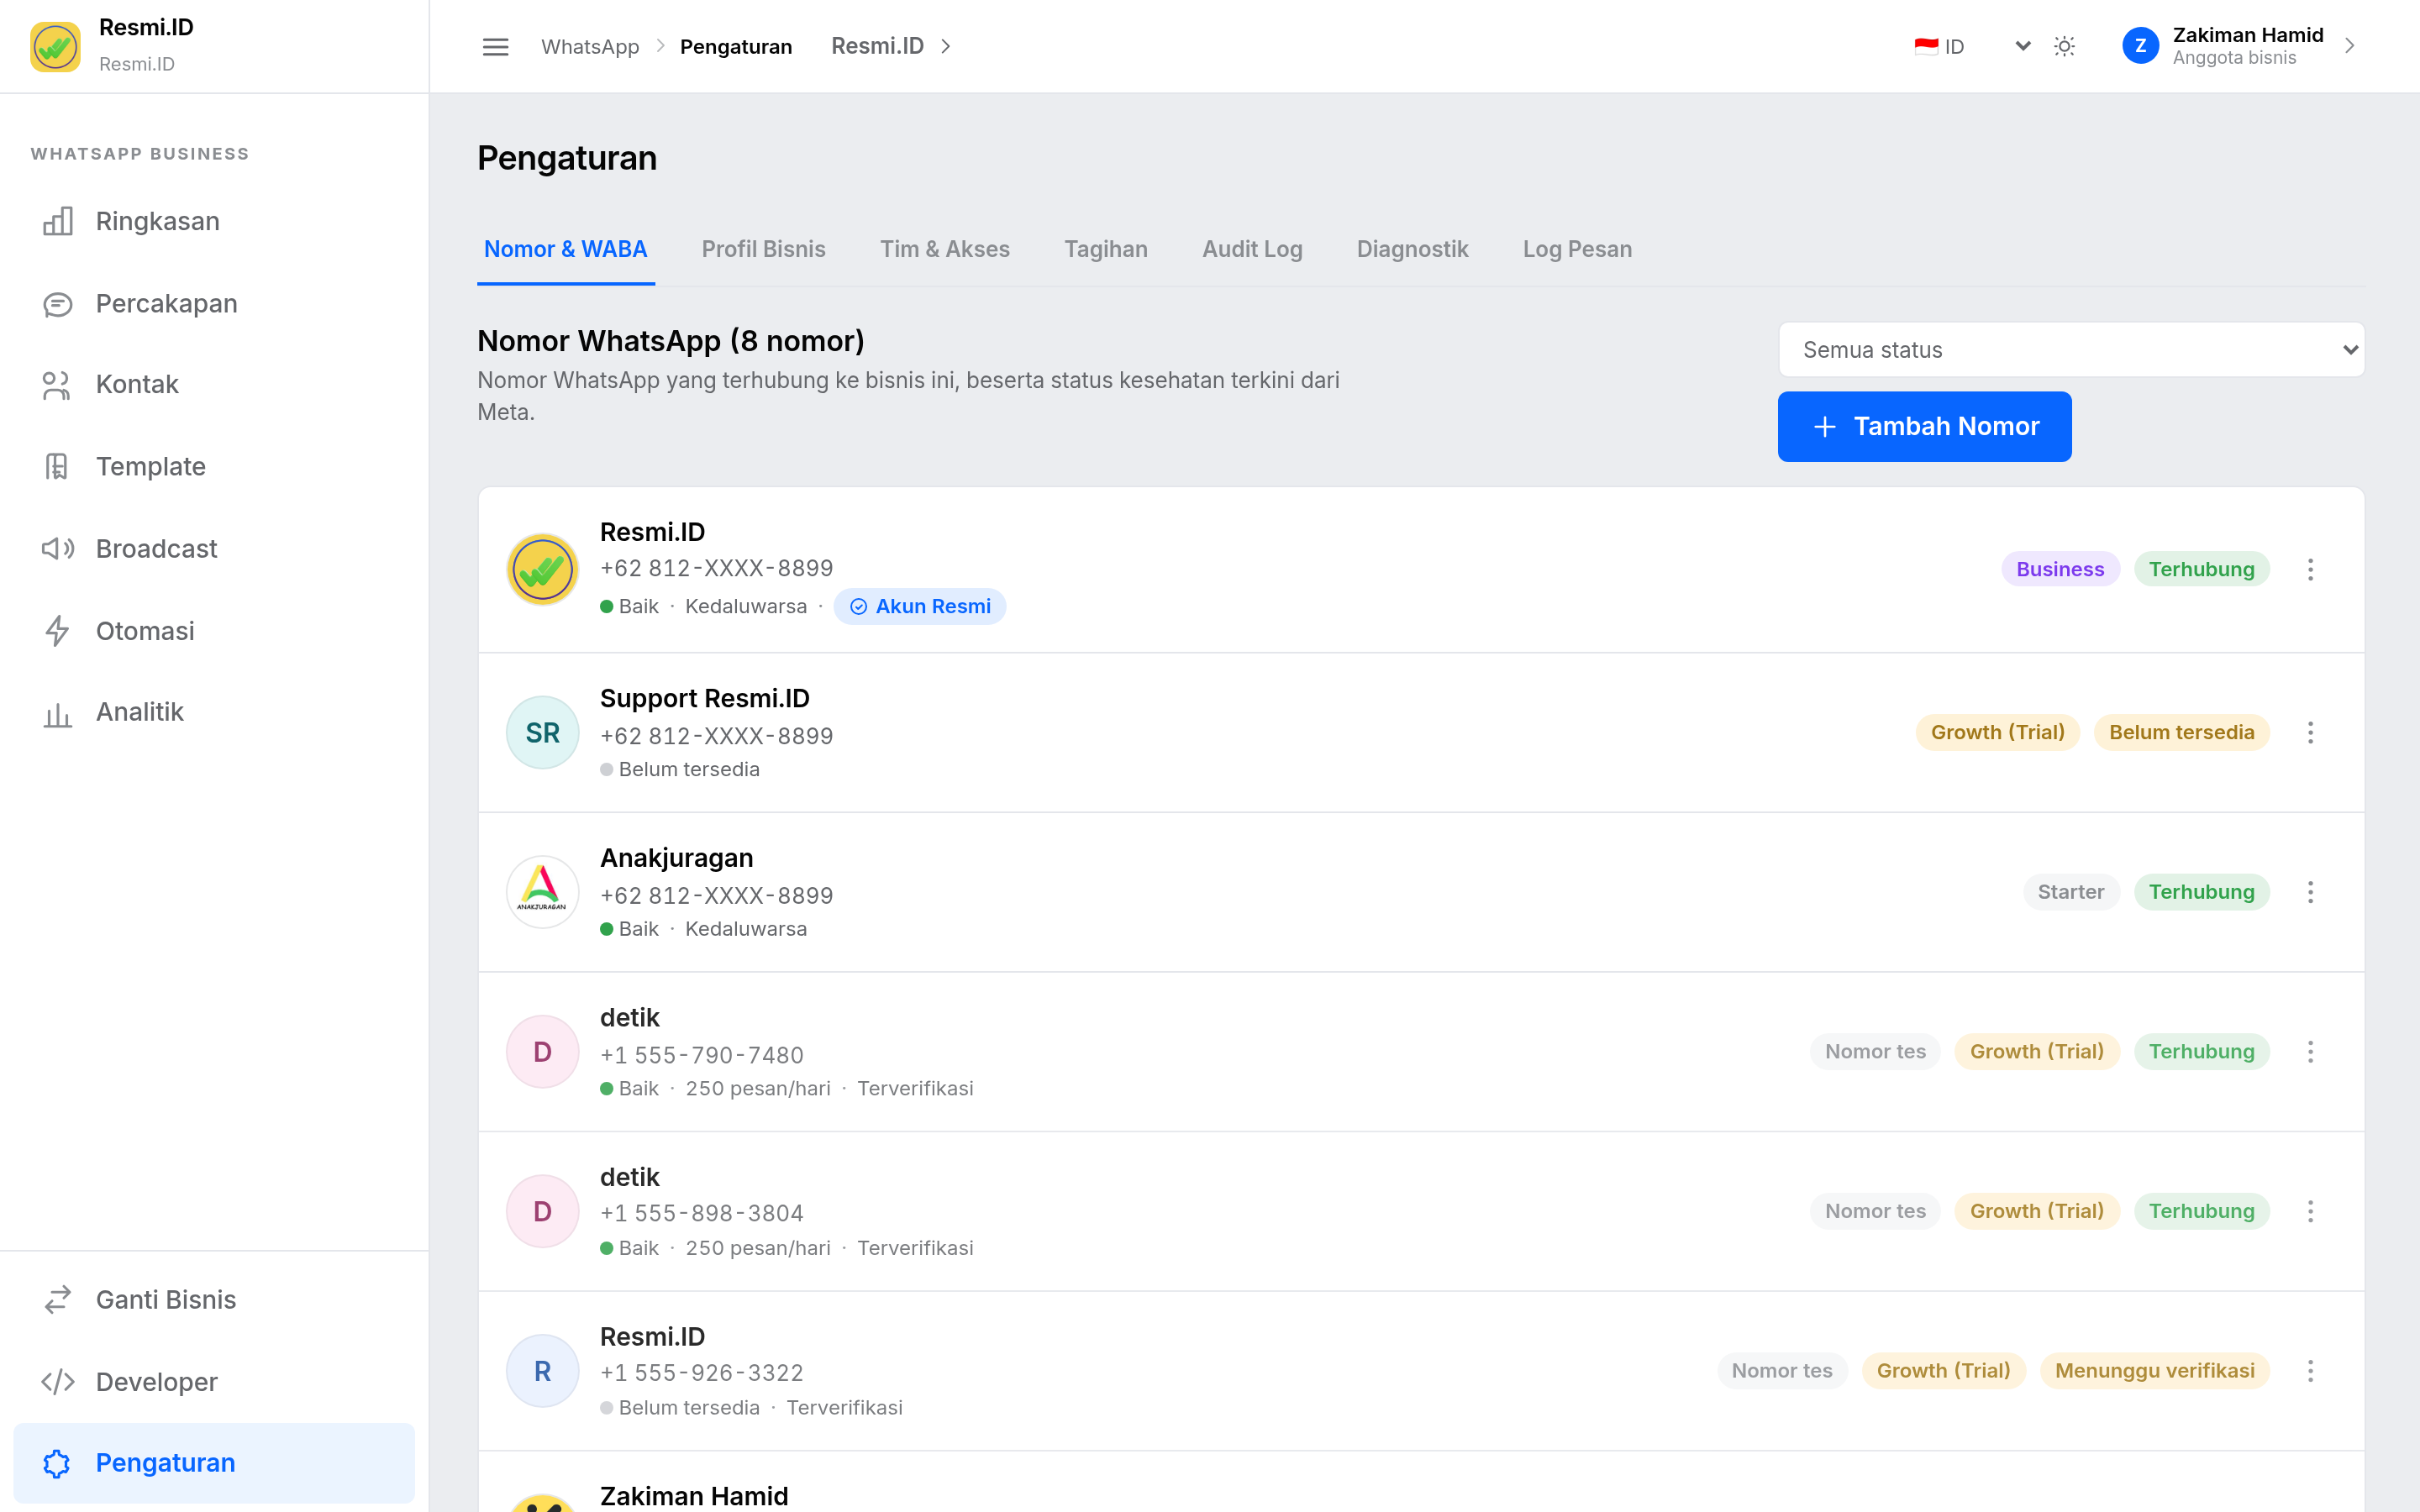
- Numbers & WABA — the list of connected WhatsApp numbers along with their status.
- Business Profile — the display name, description, address, website, and profile photo your customers see.
- Team & Access — invite team members and set their access rights. Access can also be limited per number.
- Billing — Resmi.ID platform fees, Meta conversation charges, and the active plan.
- Audit Log — a record of who changed what and when.
- Diagnostics — tools to help when there are delivery problems.
- Message Log — the technical history of each message, useful for tracing messages that failed to send.
API & Webhooks
All plansConnect WhatsApp to your own CRM, ERP, or internal systems.
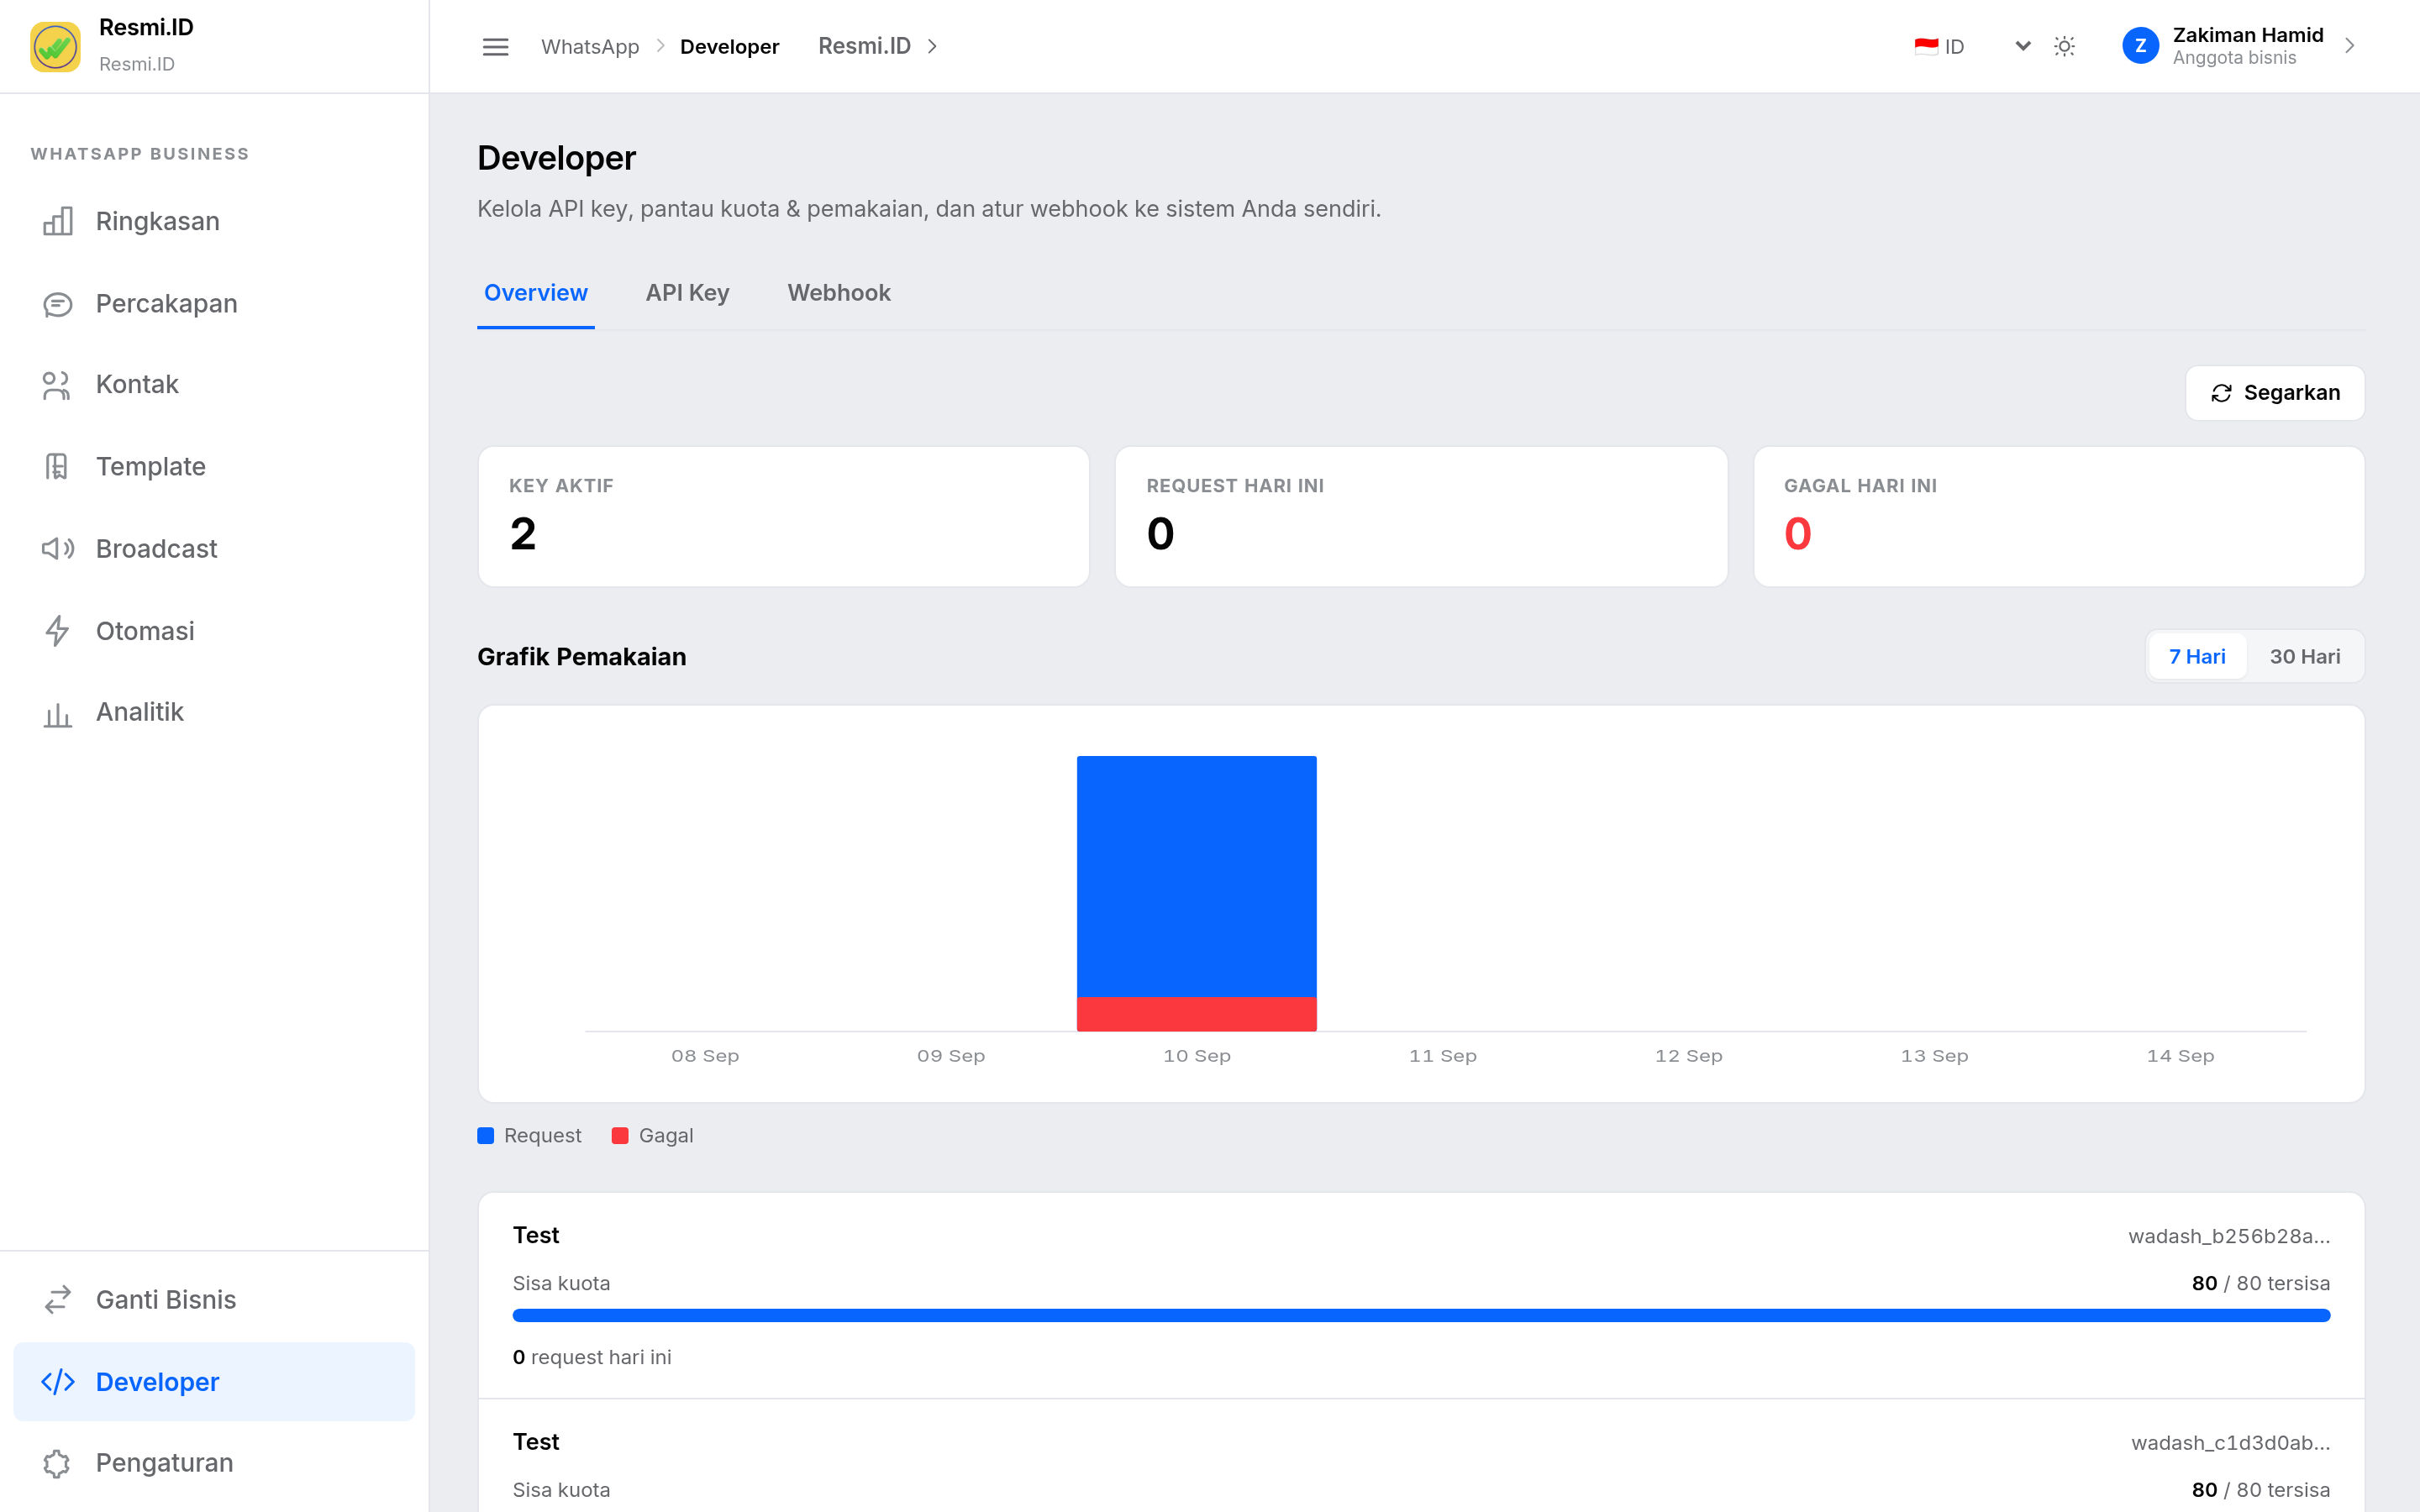
- Open the API Key tab, click Create API Key, then store the key that appears somewhere safe.
- Monitor usage and the remaining quota of each key in the Overview tab.
- In the Webhook tab, enter your system's URL so incoming messages are forwarded automatically and in realtime.
- If you ever want to turn the webhook off, remove its URL from that same tab.
Still something unclear?
Our support team is ready to help with onboarding, verification, and API integration.
Contact Our Team Cost Estimator